
Writer

Whether you have a single shop, multiple sites, or perform your business activities online, implementing a paperless workflow has now become key to driving efficiency at work and profitability in business.
To efficiently manage and streamline your workflow, your business needs a truly efficient tool that can smoothly transition your business operations to a paperless environment where you can create, store, and share your documents and files securely without facing any hassles.
Fortunately, there are tools in the market that can streamline your workflow by making all such tasks much easier for you. And the best thing is you don't need to be tech savvy to use them. Not at all. Here, we will discuss one of the most coveted tools in this category, i.e. SmartVault. So, just keep reading till the end of this post.
What is SmartVault?

SmartVault is a cloud-based document management and storage software offering easy, fast and efficient file sharing and storage solutions. The tool has been particularly designed to assist tax and accounting professionals, financial institutions, retailers, manufacturing units and construction businesses in storing documents online, sharing files securely, collaborating, sending and receiving eSignatures right away via a unified portal.
The tool is aimed at making professionals and SMBs more comfortable and productive by automating their low-value and repetitive tasks and getting their work finished faster. All this, in turn, gives you the freedom to spend more time on things that bring more value to your business and personal life.
The software complies with various statutory requirements and guidelines like SEC, GDPR, CCPA, GLBA, and FINRA that are intended to fulfill legal obligations and prevent violation of rules.
Benefits of Using SmartVault
The main benefit that SmartVault offers is saving time as well as money by transitioning your business to a paperless environment—a paperless office and standardized workflows. It helps you in the following ways:
Securely Store, Manage & Share files
It facilitates your document workflow by storing all your documents in just one place and allowing you to securely share them with the desired people when it is needed.
Automate Manual Paper-based Tasks
It helps you cut your time that you spend most on fetching, filing or finding documents and spend more time doing what is more important and valuable.
Eliminate Security Vulnerabilities
Consumer-grade cloud apps can put your business at risk any time. SmartVault-offered bank-level AES-256 encryption, authentication technologies and auditing parameters help you stay safe, secure, and in compliance.
Create Efficient, Standardized Workflows
SmartVault's standardized templates and simplified workflows broadly help you streamline your business processes and gain work efficiencies that scale up your business.
Easy to Learn and Easy to Use
It's so easy to get started and fun to manage that all of your employees, partners, and even your clients will love it. The developer of the software guarantees you'll love it, or you'll get your money refunded.
Industries Who Use SmartVault
Professionals and businesses across industries like Accounting, Community Banks, Financial Services, Real Estate, Construction, Legal, Retail, Franchising, Education, Credit Unions, Healthcare, Manufacturing, and anyone looking for secure document management & file sharing use the services of SmartVault happily. And almost every one of them agree that they save a lot of their most valuable asset, i.e. time.
What Does SmartVault Do Specifically for Accounting Professionals?
SmartVault stands on the top rung of the performance and popularity ladder even when it comes to cloud-based document management, file sharing and client portal solutions for accountants. The software specifically helps accounting professionals become more productive. It streamlines the way they collect, organize, and share documents. At the same time, it keeps their data secure and in tax and accounting compliance. With SmartVault, document management to accountants turns out to be a breeze and that's why it has been top-rated among accountants, too.
SmartVault Features and Usability
SmartVault offers an online secure documents storage and sharing solution which brings all the features and usability to your accounting business that your business needs to streamline and simplify your documents workflow as well as maximize productivity, And, at the same time, they keep your data safe, secure and compliant.
 Securely exchange sensitive files
Every bit of your data is protected by encryption. Only you, your clients, or any authorized person will be able to access your data through authenticated login.
 Simple, easy-to-use Interface
The SmartVault interface is so easy to handle. You can just drag and drop the desired files to your client portal. Also, you can view them in their browser without any need to download them.
 One-step Storing and Sharing
SmartVault lets you set up automatic email alerts that notify your clients whenever a new file is uploaded and ready for them for viewing.
 Client Portal Branded for your Firm
With this feature, you can personalize your client portal with your custom business logo and color scheme and further link the same to your website. This helps you create a unique brand identity with your clients.
 Customized User Permissions
SmartVault gives you full control over who can access files and who can't. You can allow or restrict permissions for creating, editing and deleting files.
 Audit and Version Controls
The activity log records all activities with their timestamps and their version history feature allows you to retrieve your deleted or overwritten files anytime you need them.
 eSignature
With the built-in eSignature support backed by Docusign, you will be able to get all your required documents signed in one single step.
 Mail Merge & eMail Templates
You can distribute documents even in bulk to one or all of your clients in one go.
 Mobile Access
You can access your files from a mobile device anytime, anywhere.
 Desktop Access
With the lightning speed and robust performance of the desktop app, you get lightning fast access to the documents stored in the cloud.
 Folder Templates
You can streamline all your processes with customizable SmartVault folder templates.
 PDF Printer
Using the smartvault PDF printer, print documents from windows file explorer or your desktop, print files to pdf and automatically save them to smartvault from any application, upload files to smartvault, autofile documents, print tax returns to smartvault using the auto-filer tool, etc.
 Scanner Integration
This feature allows you to digitize all your documents swiftly with one-touch scanner integration.
 Full Text Search
You can find the files you need whenever you need them. This feature helps you search any documents with file names, tags, and even text within the files.
Is SmartVault Safe and Secure?

The short and straightforward answer is YES. The security of customer data was the first and foremost thing that topped the priority list while the software was developed. Moreover, the developer of SmartVault also continually examines the level of security and tries to improve their security technologies and procedures according to the demand of the time.
With SmartVault, all of your data is safe and secure whether in transit, at rest or backed up. All interactions (data in transit) with SmartVault are done through an encrypted channel. The developer employs SSL to prevent your interactions, passwords, and other data from any security threats.
All your documents and information stored or backed up in the database are encrypted using AES-256 technology which is virtually unbreakable using brute-force methods. Hackers would be finding themselves foolish even if they try to attempt any attack. You might or might not be aware that while it would be possible to crack a 56-bit DES in less than a day, it would take billions of years to break AES using currently available computer technologies. This is why AES is often regarded as the gold standard symmetric-key encryption technology.
SmartVault Integrations
You need a seamless integration among the apps you use to establish a streamlined workflow for all your business operations. SmartVault provides you the most powerful way of simplifying and speeding up your workflow by perfectly integrating with a host of apps below (given with the categories they belong to):
| Category | Add-Ons |
|---|---|
| Tax & Accounting: | QuickBooks, Drake Software, Lacerte, ProSeries, TaxCalc, Wolter Kluwer, Ultra Tax, FreshBooks, Xero. |
| eSignature: | DocuSign |
| Email: | MS Outlook |
| Inventory Management: | Acctivate |
| Document Fetching: | Ledgersync, Hubdoc, and FileThis Pro. |
| Document Scanning: | Canon imageFORMULA, ScanSnap Scanners. |
| Time & Expense: | Nexonia, Tallie, SpringAhead. |
| CRM: | Method CRM, Results CRM. |
What's New in SmartVault in 2022?
With the latest addition of some features in 2022, QuickBooks Desktop users, both 32-bit and 64-bit editions, can now concurrently attach documents and files to both toolbars.
Furthermore, users can add an engagement now just by going to the Engagements tab found on the client details page.
What Was Updated?
Update 1.
The SmartVault Sign-in page has got responsive on mobile screens now. It has made it easier to view and log in.
Update 2.
UK accounts will get a default Type Qualifier when they create an Entity type account.
Update 3.
The updated SmartVault API will now allow users to upload a document with a tag and then route it to the tagged folder in a proper manner.
Update 4.
When users update a template, any individual user permissions that are added through the Access and Notifications settings page will automatically be saved on the folders the template is applied to.
Update 5.
The name of the 'Add Tax Engagement' window has changed to 'Add Engagement' and the default year (current year) in case the 'Tax Engagement' is selected.
Update 6.
On the client details page, if a user misses to enter required data, the refreshed modal will remind the user of what is required to successfully save the client information by highlighting the mandatory fields with the missing data. Just see the image below:

Update 7.
There is a new option that provides users the ability to get a link on the Request Docs window. That link can be used in an email to a client to request any piece of information. You can see the same in the image below:

Update 8.
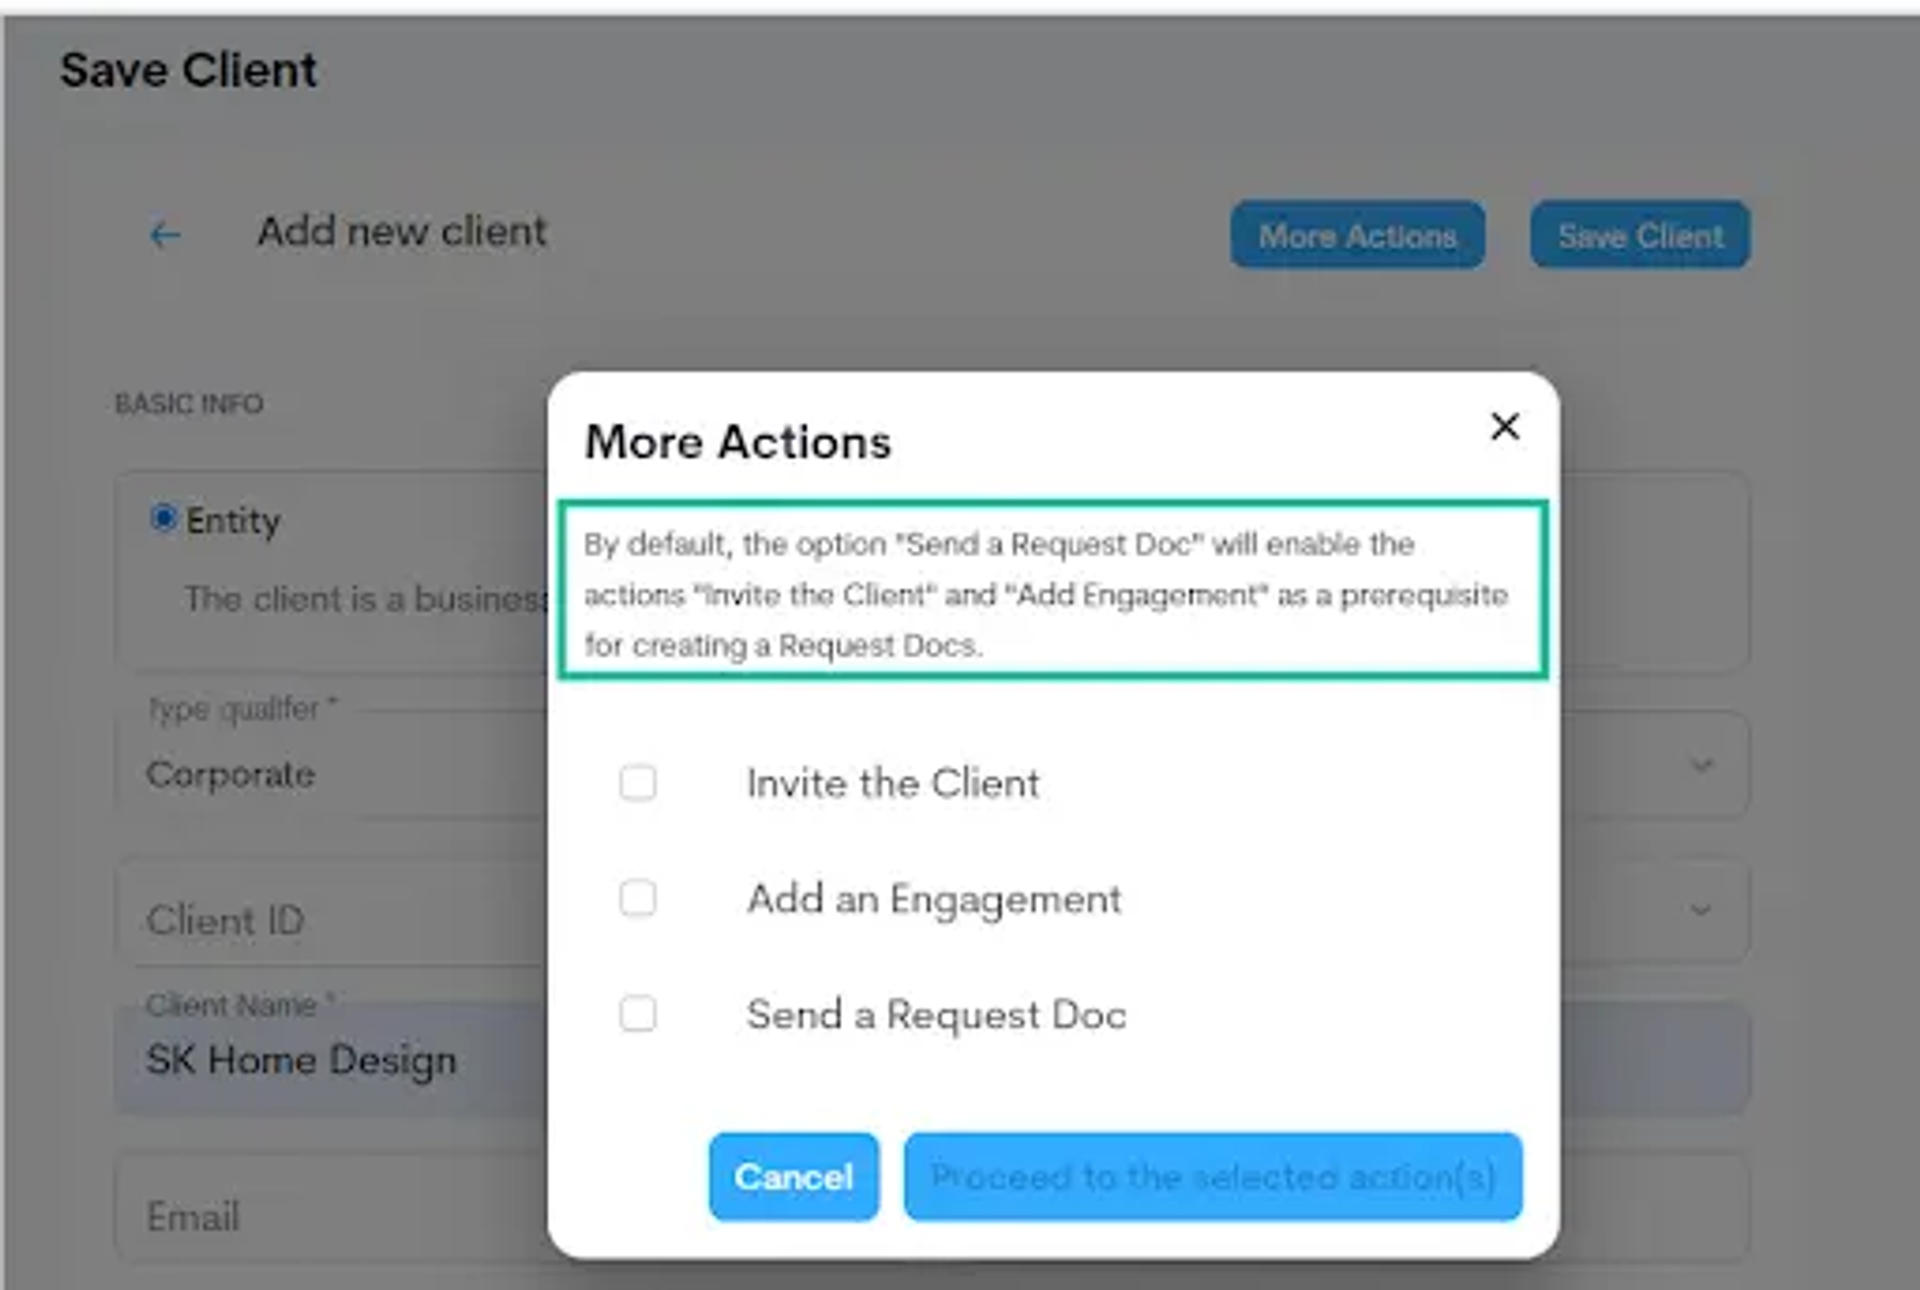
With the new updates, on the More Actions window, a blurb message will display to warn and remind users that selecting the radio button option for ’Send a Request Doc’ will automatically present by default along with the radio buttons ’Invite the Client’ and ’Add Engagement.’ Please look at the image below:
Update 9.
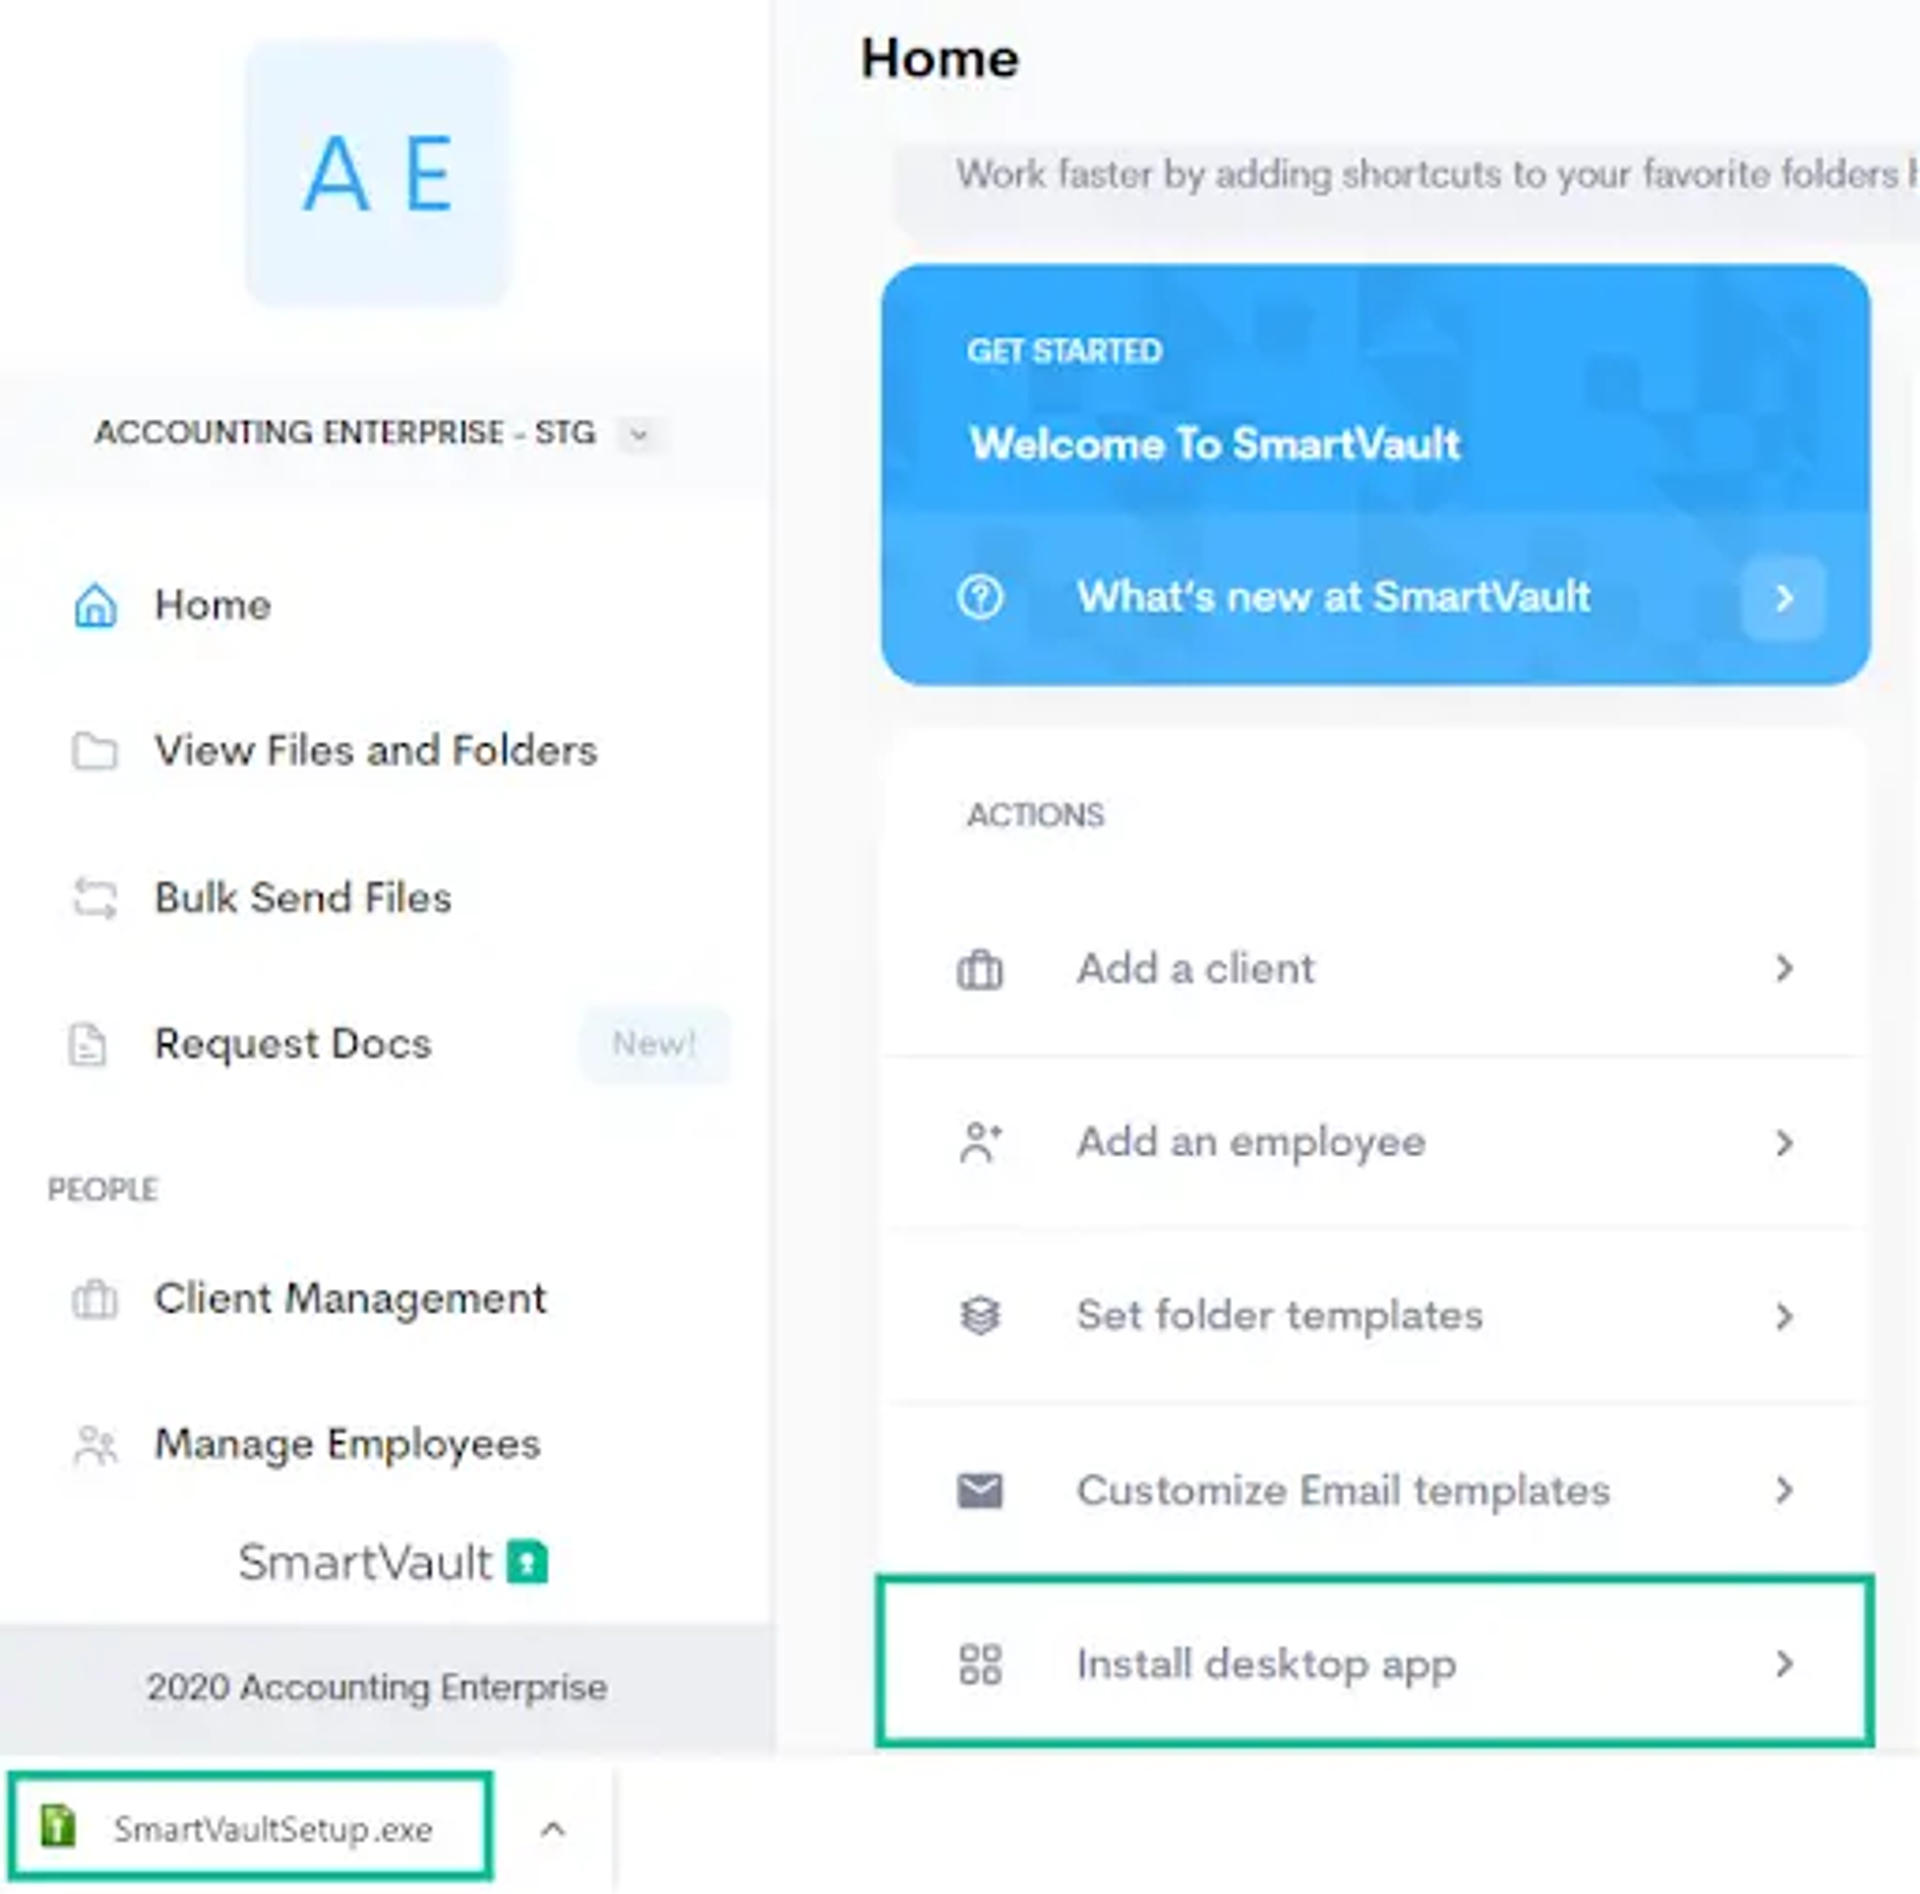
There is a new option 'Install Desktop App' tile added on home page like in the image below:
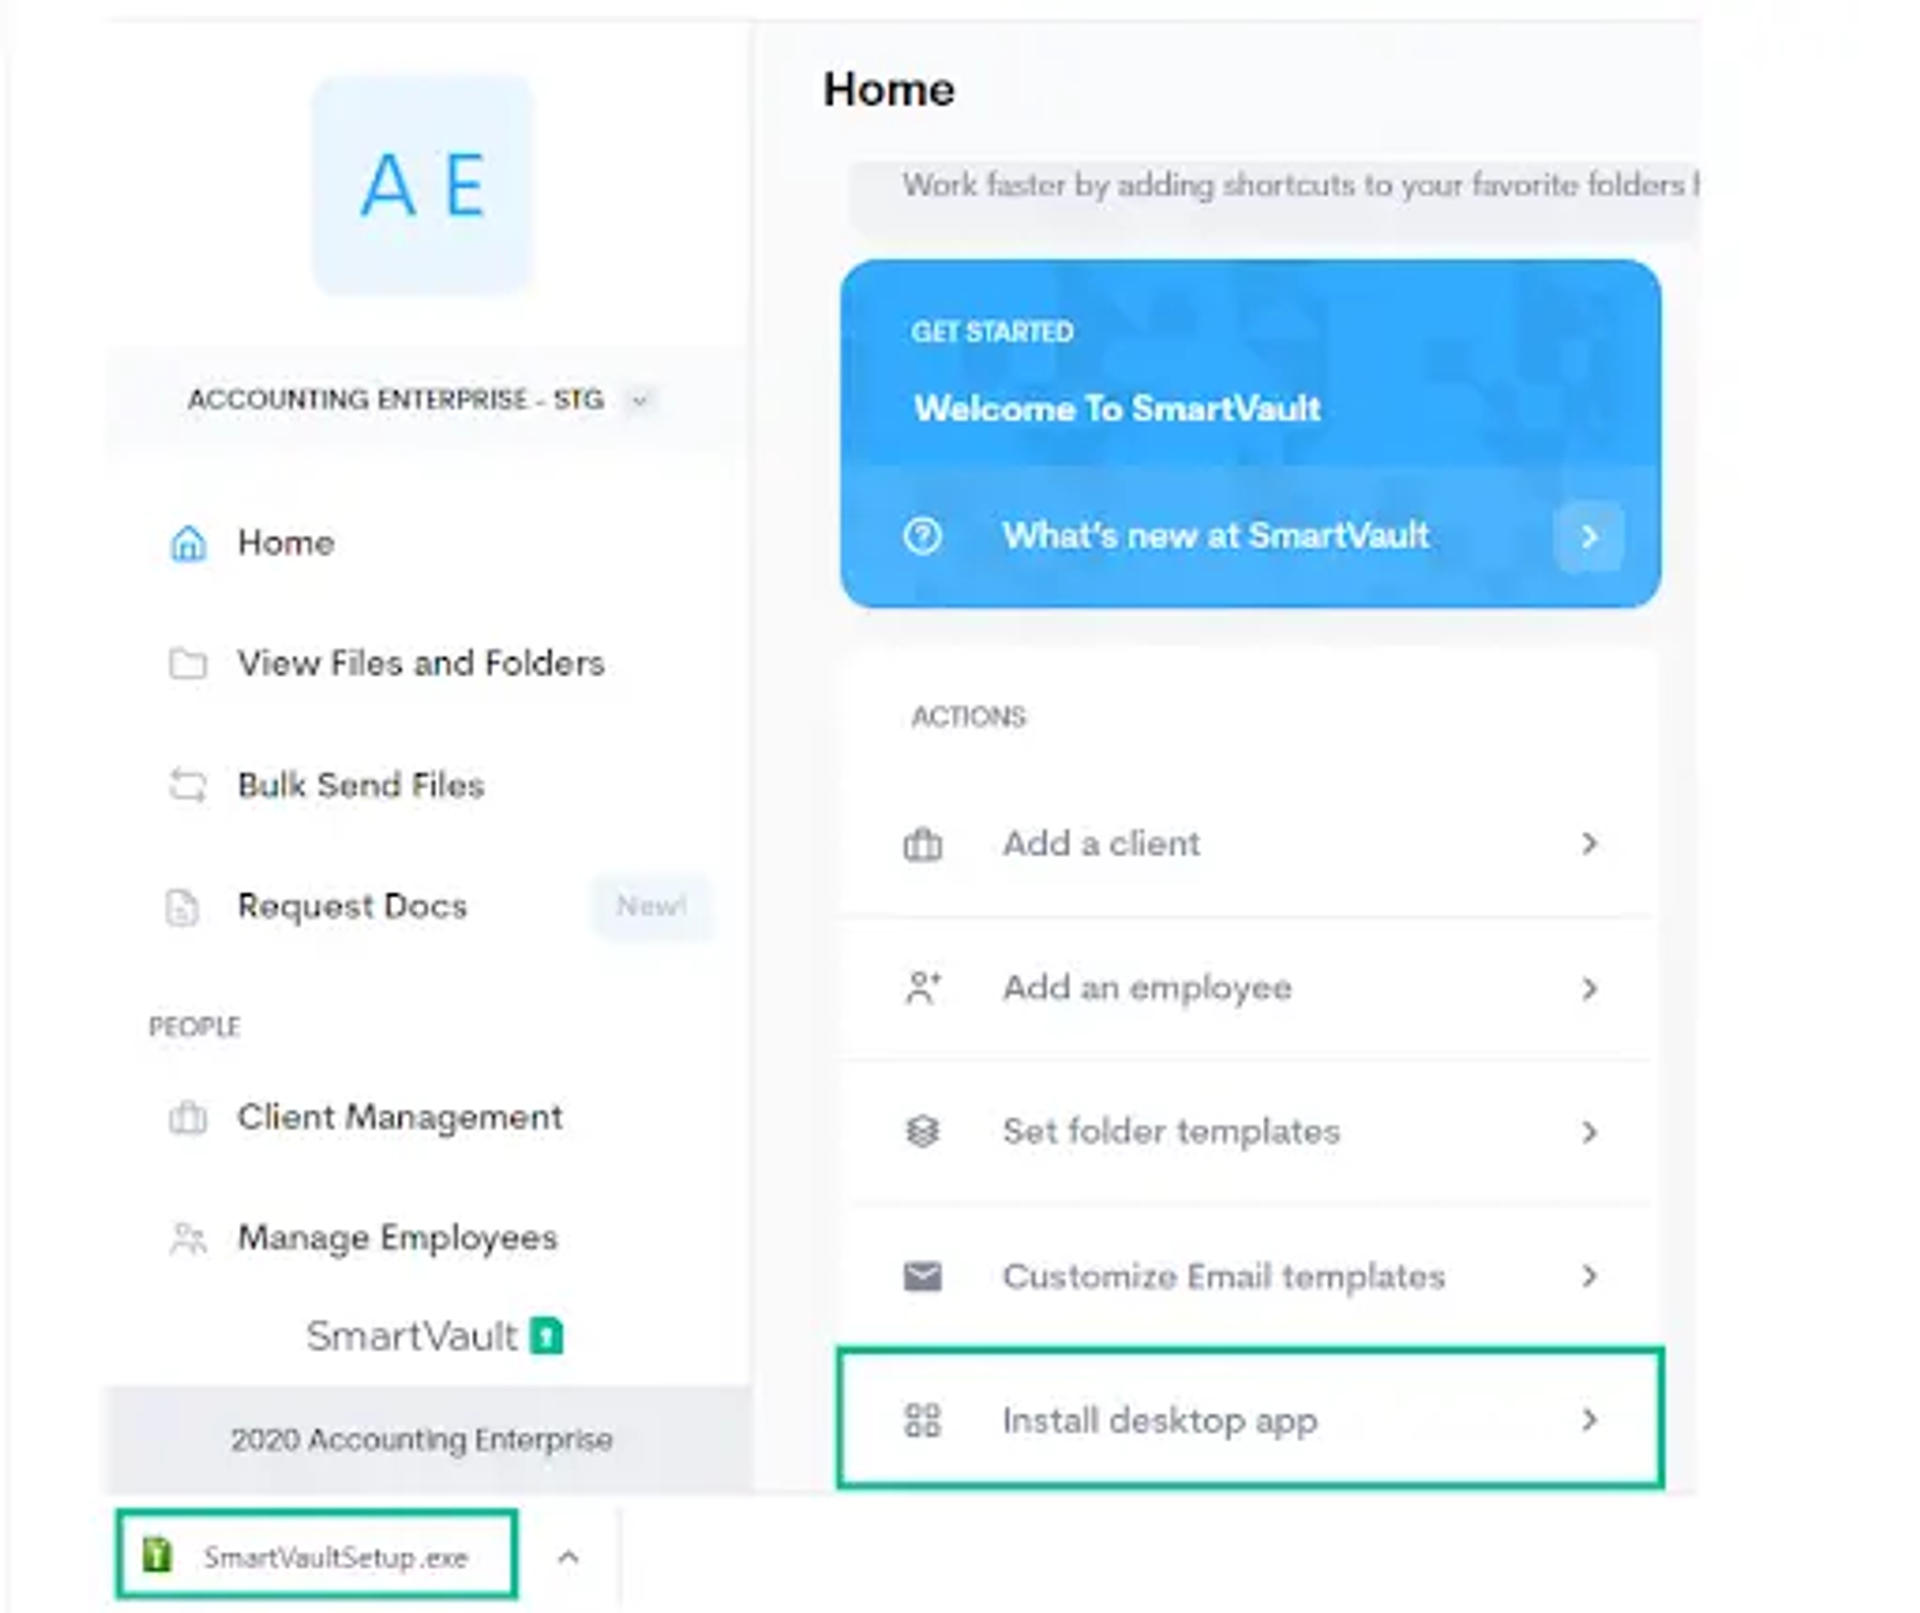
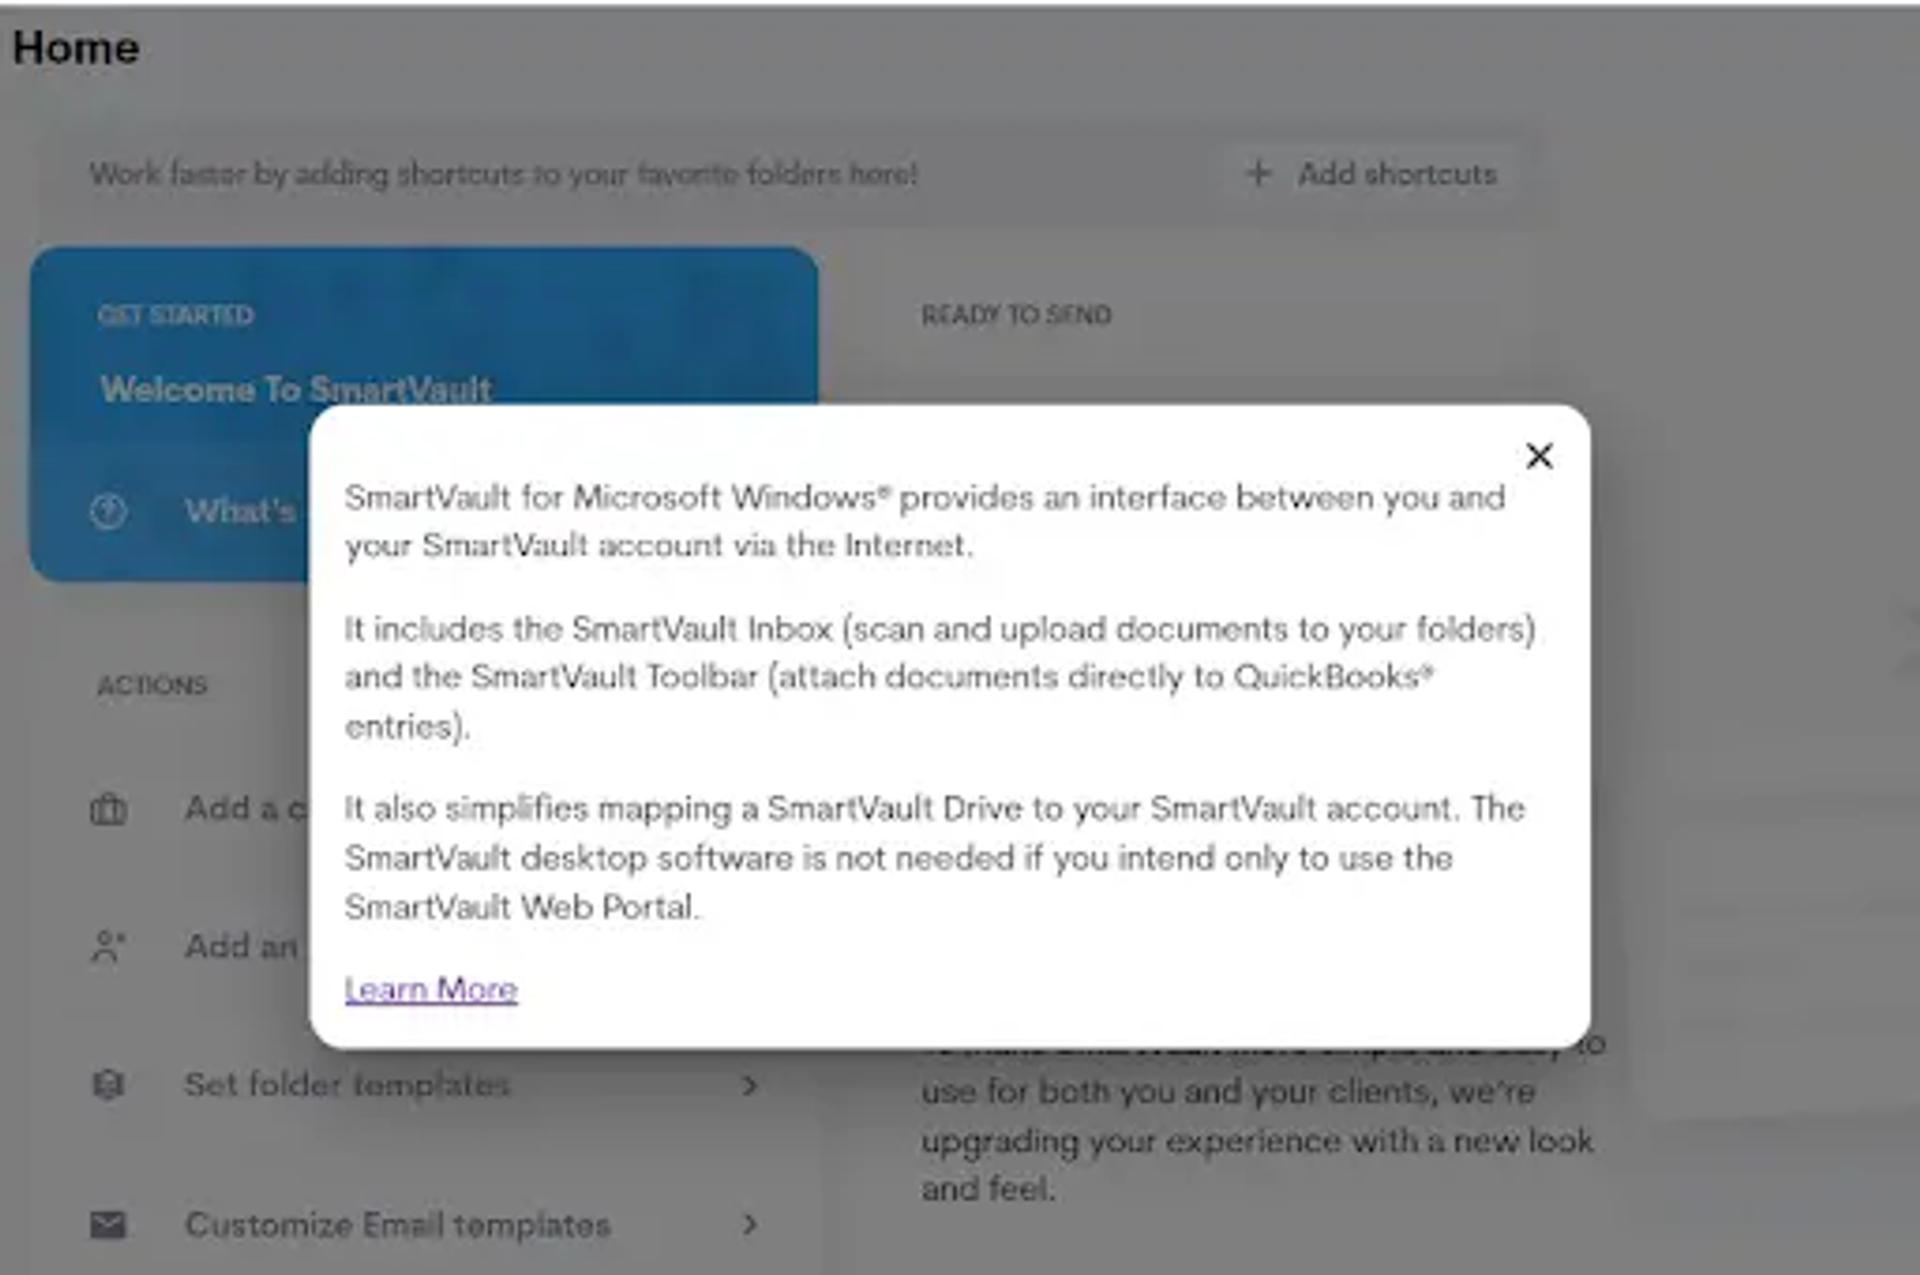
Update 10.
While trying to install the desktop app now, a message will pop up with some additional information. Clicking the 'Learn More' link inside the pop up window will head the user to the support article which includes instructions to install the desktop app

How to Login to SmartVault?
The SmartVault portal requires users to sign in before they can work with the documents stored there. This applies to any one you invite to share or view documents.
You can sign in to the portal by following these simple steps:
- Go tohttps://my.smartvault.com.
(NOTE:
If you've forgotten your password, see this article to reset your password.) - Enter your Email Address and Password in the window presented.
(NOTE:
If you want SmartVault to remember your user name and password, enable the Stay signed in checkbox) - Click Sign In. And it's all done.
How to Reset Your SmartVault Password?

Before You Begin Resetting Your SmartVault Password
Please note that the admin or any other authorized person can initiate a request for resetting the SmartVault account password on behalf of another user, guest or client. However, the email containing the password reset link will go straight to the person's inbox whose email address is saved on the Account Access page.
Similarly, if the user uses the SmartVault Drive, the user will be required to re-map their SmartVault Drive after changing the password.
Please also note that SmartVault keeps your account and password fully secured. Even SmartVault employees can no way see your password. So, leave any worry of the security of your SmartVault account and password.
Steps for Resetting Your Password
Step 1. Go to the Account Access page.
Step 2. Enter your email address or the email address of the person you are resetting the password for, and click Continue. Once you submit your request, you (or the designated person) receive a SmartVault password reset email directly to your email inbox.

Step 3. Once you open the email containing the password reset link, you need to click on the link to reset your password (that will look like below):

NOTE
- The link expires 24 hrs after it's generated.
Step 4. In the Reset Password window, enter your new password and then confirm it.
NOTE
- You cannot use colons or semicolons in the password.
Step 5. Click Reset Password. And it's all done.
What to do if you did not receive a password reset email?
Check for the following if you (or the designated user) have not received the password reset link:
- Check your spam or junk folder. The email containing the password reset link might be lying there.
- Check the spelling of your email address, or try an alternative email address if there is any chance of forgetting the email address saved on the account.
- Add notify@my.smartvault.com as a contact or whitelist the email address in your email spam settings.
If you are still unable to reset your password, contact SmartVAult Customer Care. They will resolve the issue in a matter of minutes.
How to Download and Install the SmartVault App?

To download and install the SmartVault app, we understand that it would be better to provide you with the direct links from the SmartVault help page so that you can quickly get to the instruction page that is particularly suitable for you. And it is with just one click.
You may also want to know the system requirements for installing the software. Keeping this in mind, we are putting a help link for you. In case of need, you can refer to the link given below.
SmartVault Desktop Software System Requirements: https://help.smartvault.com/hc/en-us/articles/360051273233-SmartVault-Desktop-Software-System-Requirements#smartvault-desktop-software-system-requirements-0-0
Installing the SmartVault Desktop Software:
Downloading SmartVault desktop software for windows is an absolute breeze. Just download the .exe file of the software from the portal. Then install the SmartVault software on your PC or laptop by using the SmartVault Install Wizard.
The SmartVault desktop software will automatically install other required components: the SmartVault Portal, the SmartVault Launchpad, the SmartVault Connected Desktop, and the SmartVault Inbox.
Please remember that it is a must you first download the installation file from the Setting Page or the Portal Home Page. Please follow the instructions below:
For downloading the installation file from the Home page
- Sign in to the SmartVault Portal.
- Click the Install desktop app tile.
- The installation file will download and appear in the Download bar of your browser. Also, a message will appear with some additional information.
- Run the installation file
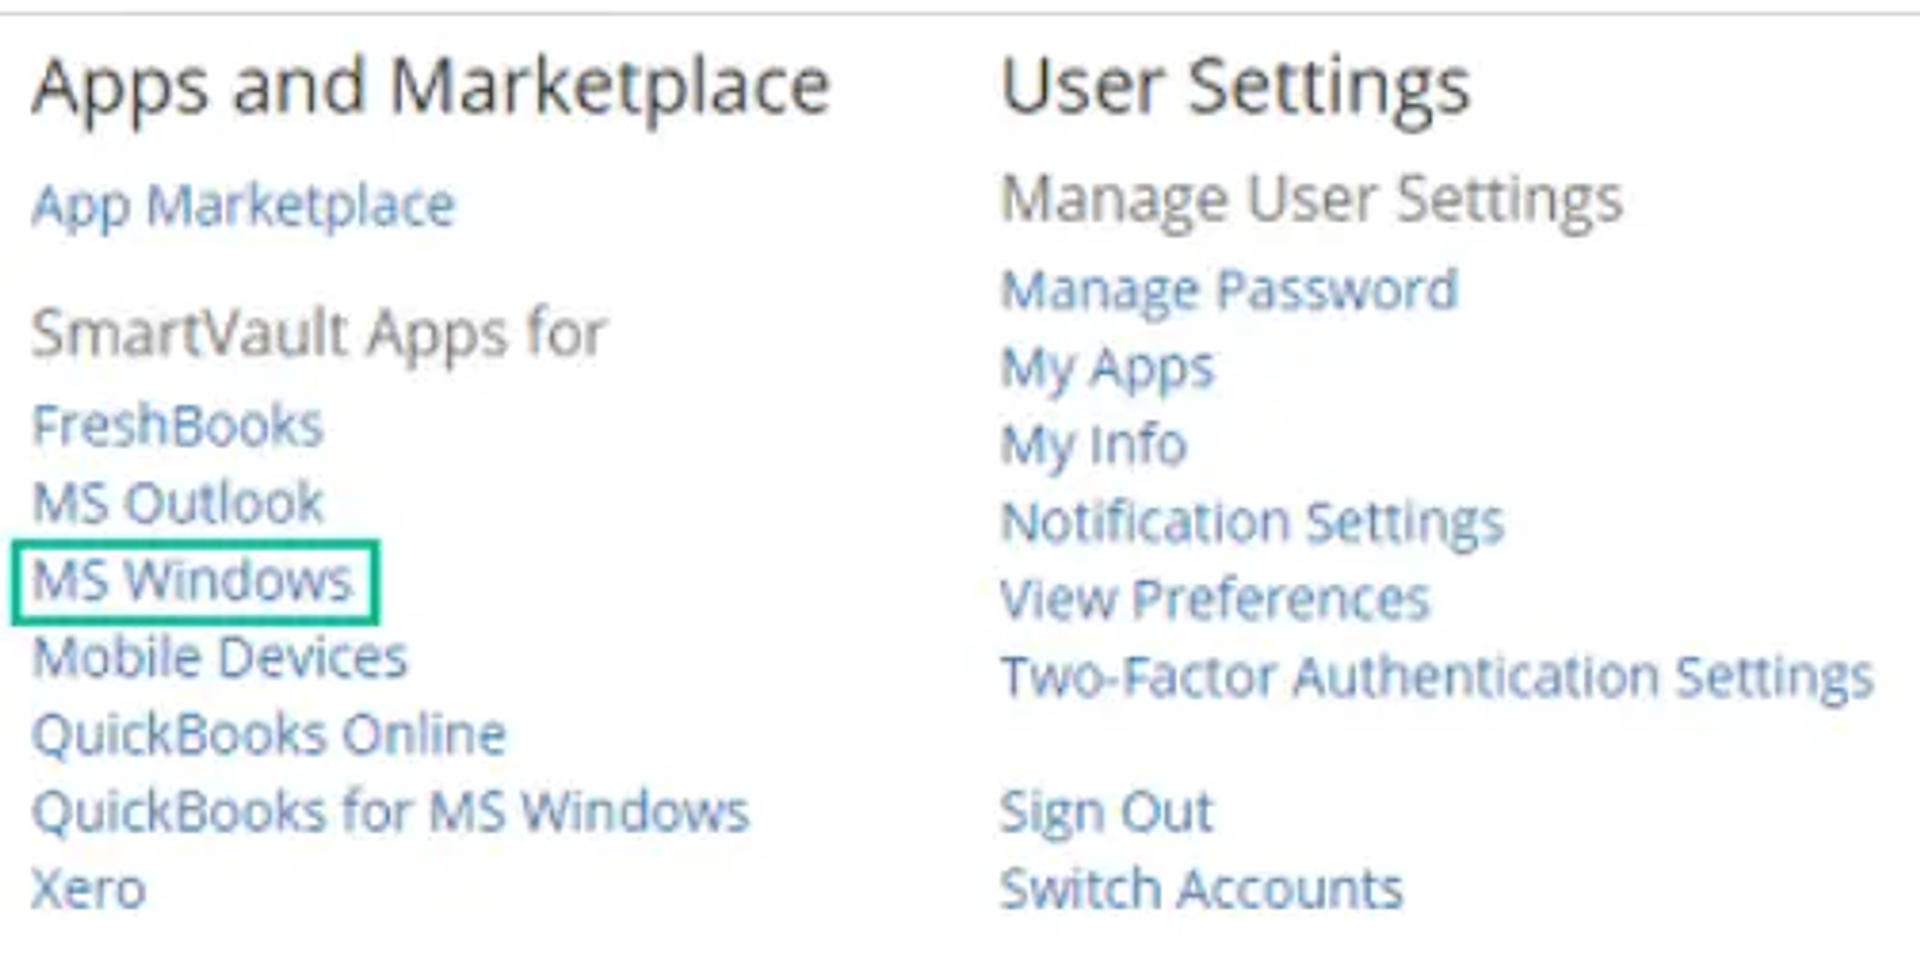
For downloading the installation file from the Settings page
- Sign in to the SmartVault Portal.
- Click on your initials at the top of the screen, and click Settings.
- Click MS Windows underSmartVault Apps for.
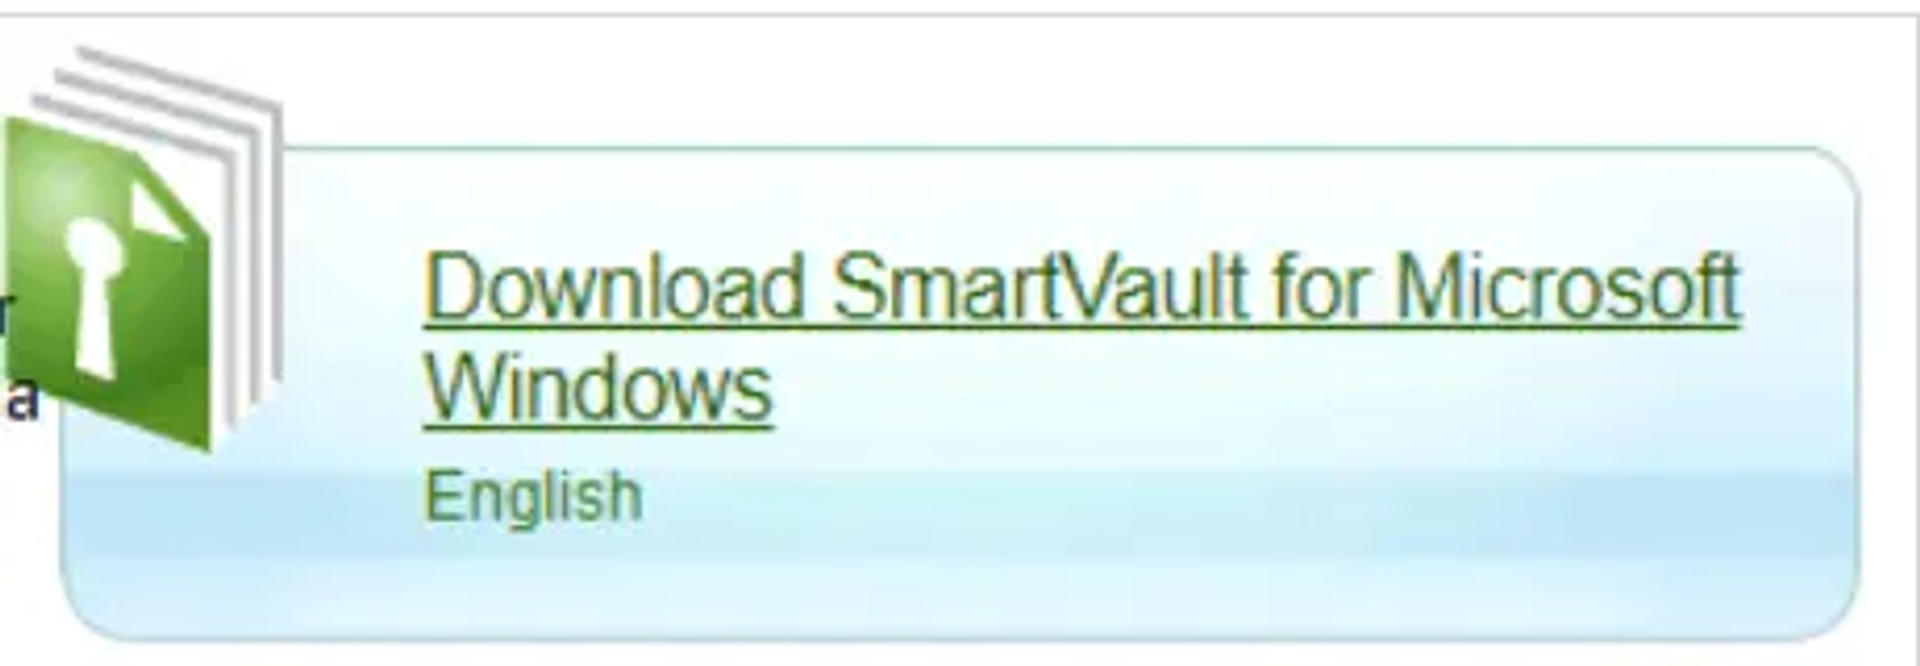
- ClickDownload SmartVault for Microsoft Windows.
- Run the installer file.

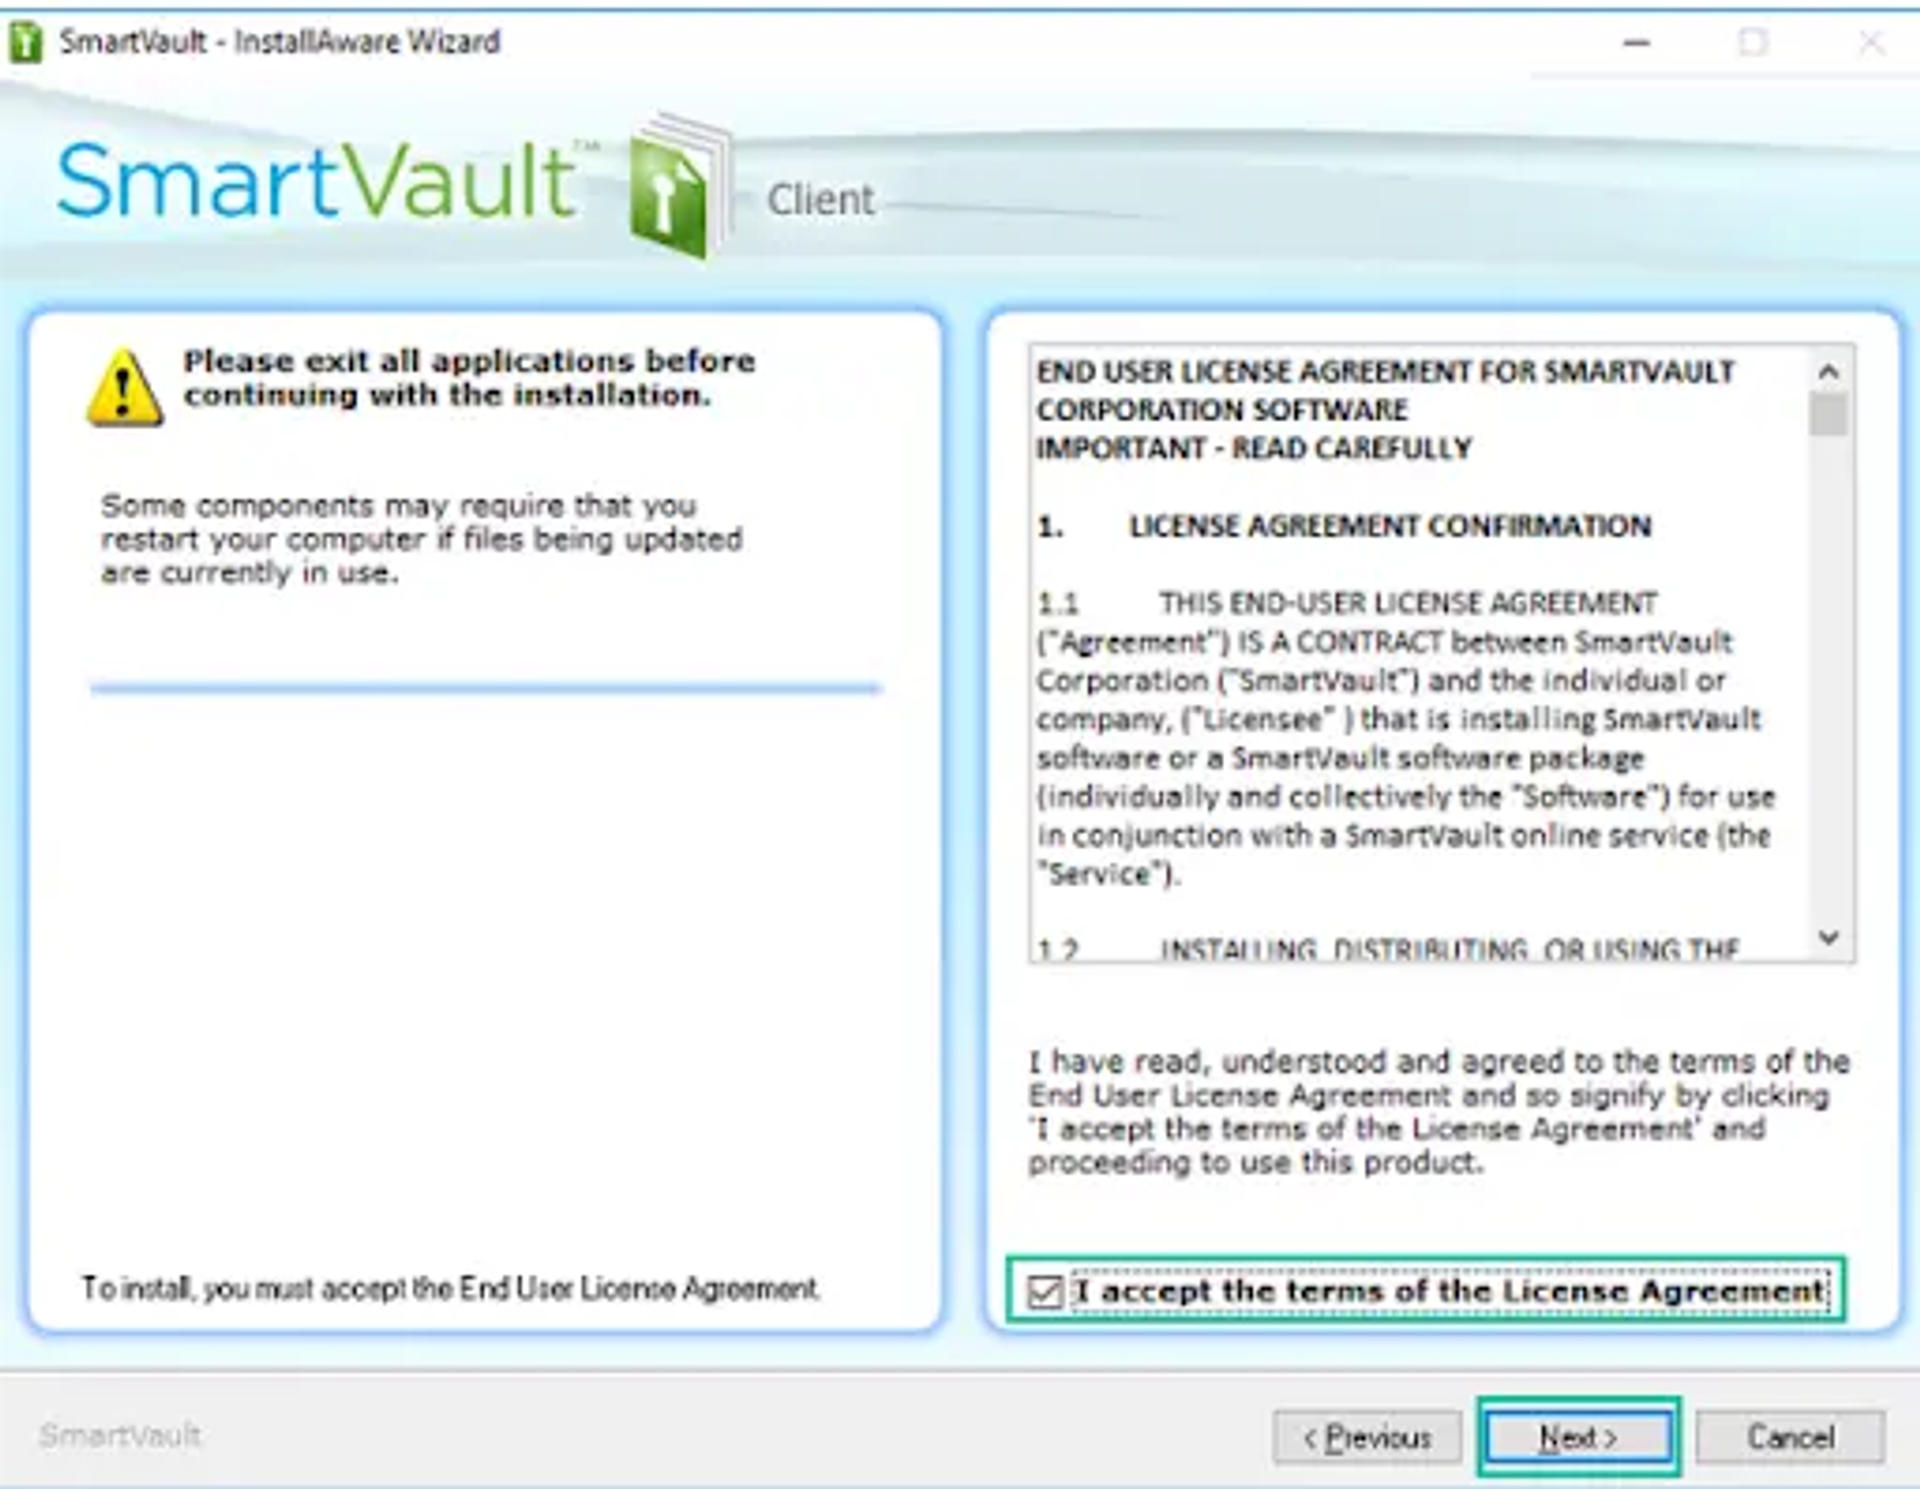
Steps to run the installation file


- Click Yes on the security warning.
- Follow the prompts on the SmartVault Install Wizard.
- Accept the Terms of the license agreement and then clickNext.
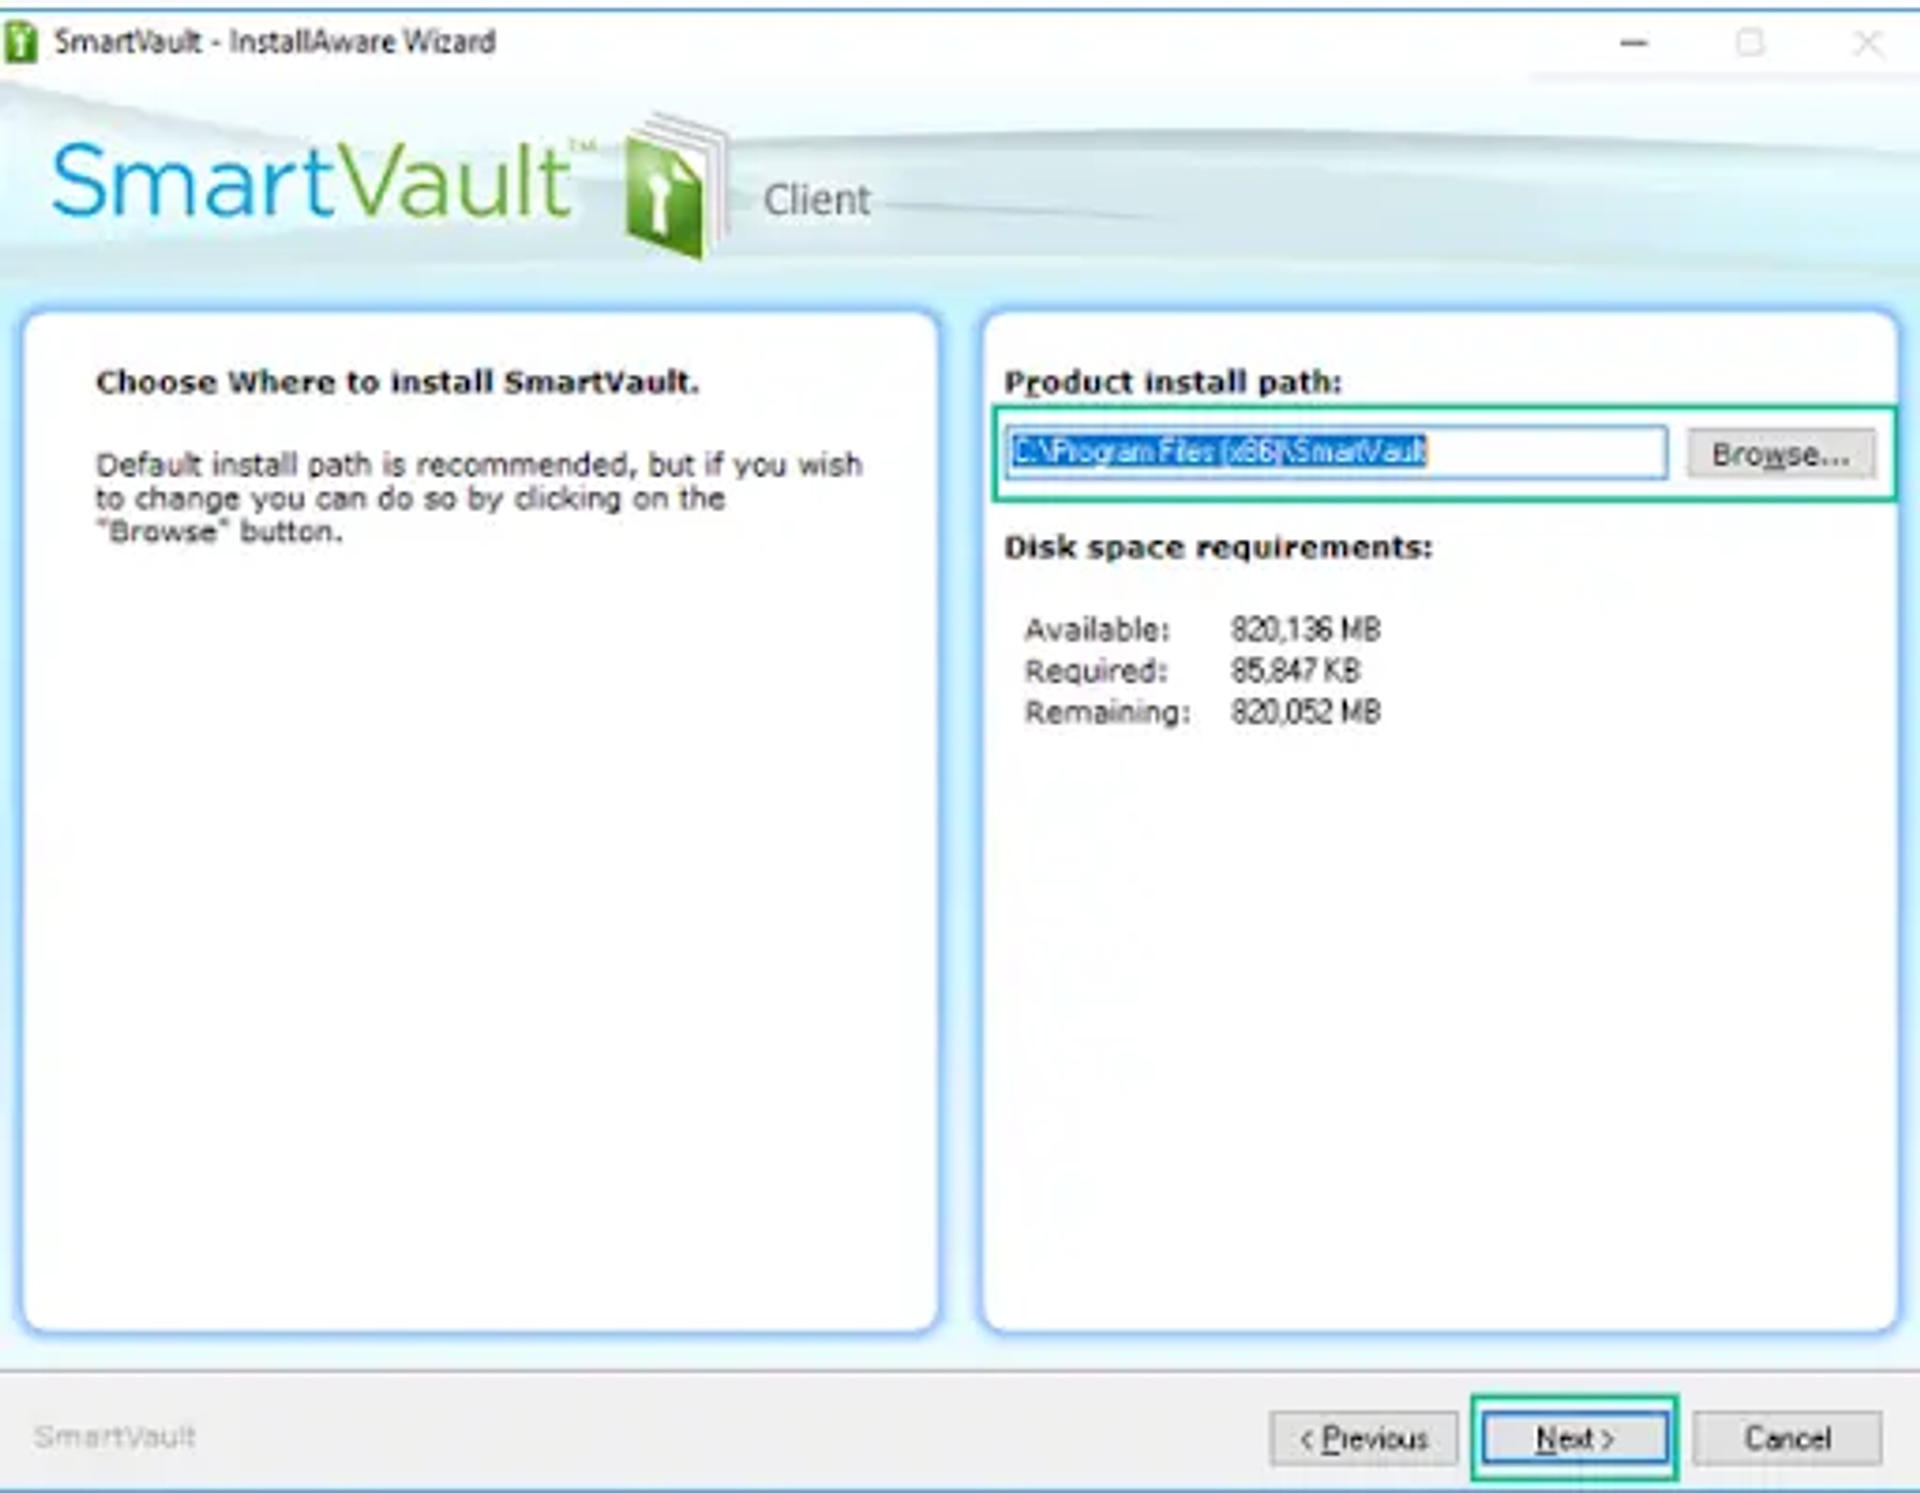
- Choose the default product install path and then click Next.
- To create desktop shortcuts for the SmartVault Connected Desktop, SmartVault Launchpad, SmartVault Portal, and the SmartVault Inbox, enable the Create desktop shortcut checkbox for each item you want to create a desktop shortcut for and then click Next.
- Click Finish to complete the installation.
NOTE:
You should install this software in your C:\ drive.

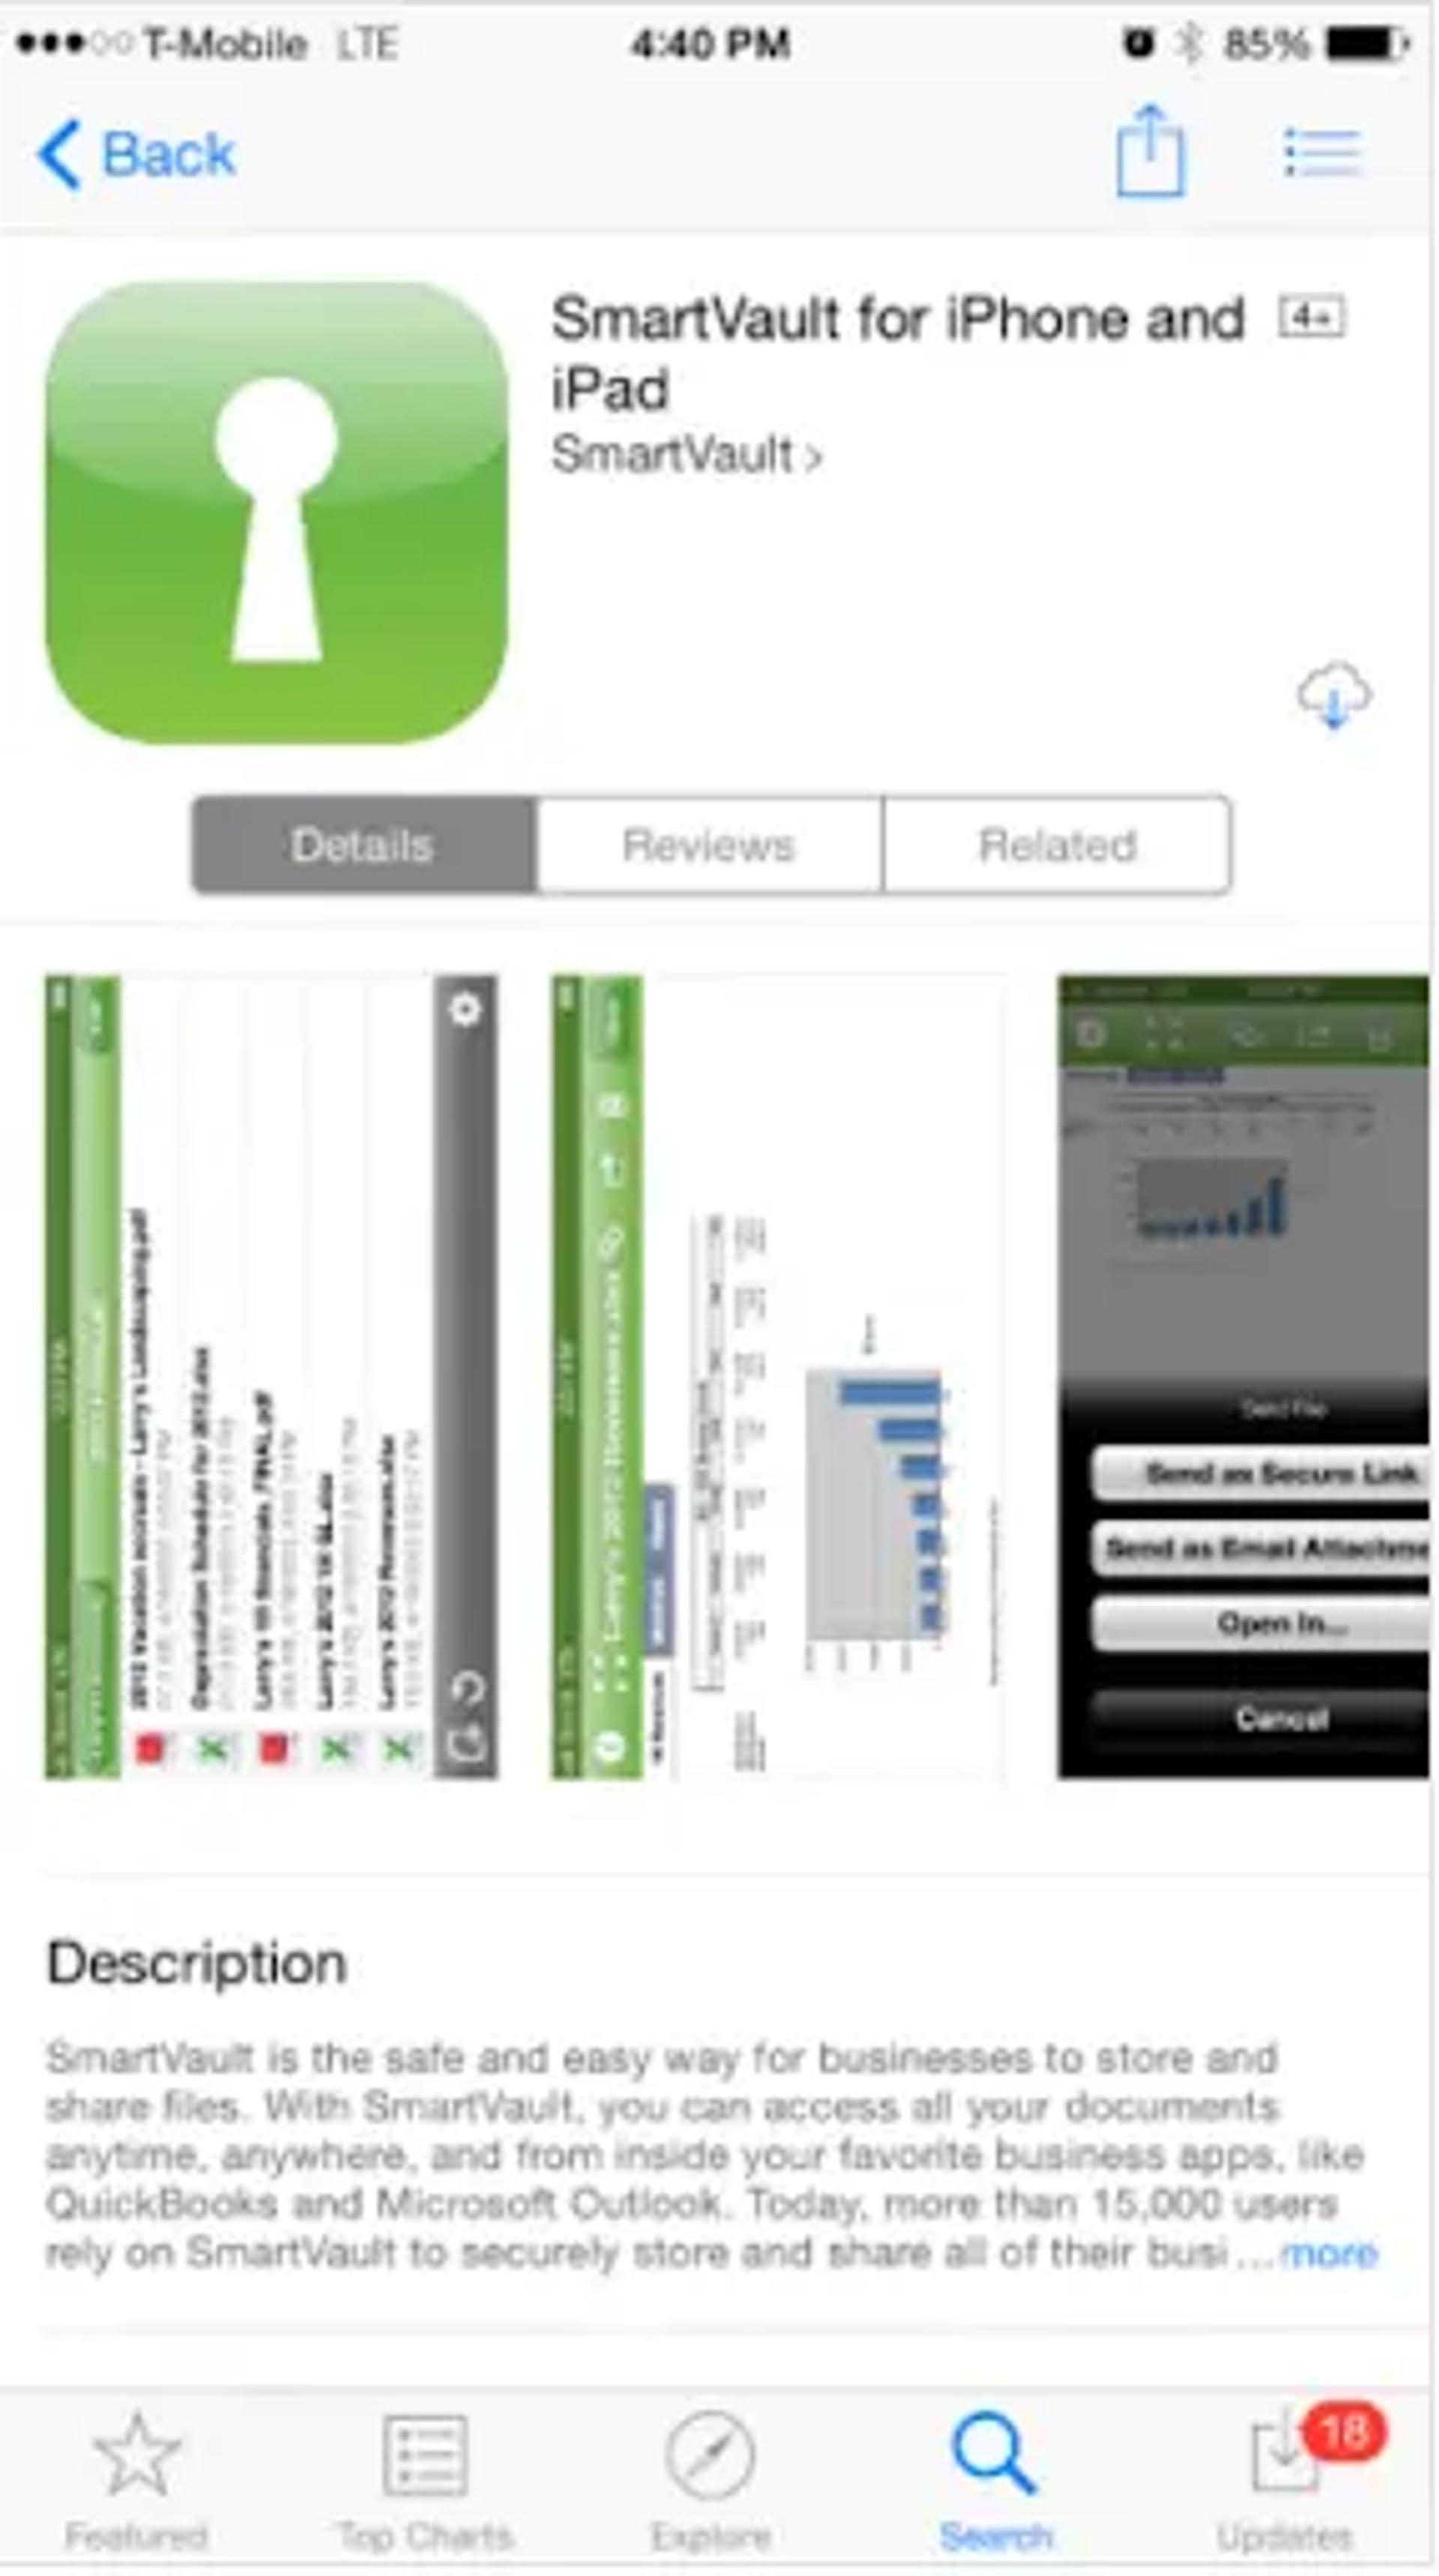
How to install the SmartVault App for the iPad or iPhone:
With your SmartVault apps for iPad and iPhone, you get a powerful SmartVault command center directly on your device that you can utilize to search, browse, view, and share your stored documents.
It's also worth knowing that with the SmartVault app on your iPad or iPhone, you can perform the following tasks in a breeze:
- Send or receive links to files.
- Email files as attachments to anyone.
- Search for files just like you do in the SmartVault Portal.
- Effortlessly upload photos onto SmartVault. This comes handy also for taking screenshots of receipts (or any other images you want to upload onto SmartVault).
- Work with other apps that support the “Open in…” feature to share files between apps.
- Take advantage of the enhanced PDF viewer in the full-screen mode. This works amazingly for viewing PDF files on your iPad. This is a great way to run slide shows right from your iPad (just save presentations to PDF one slide per page for this purpose).
Installing the SmartVault App
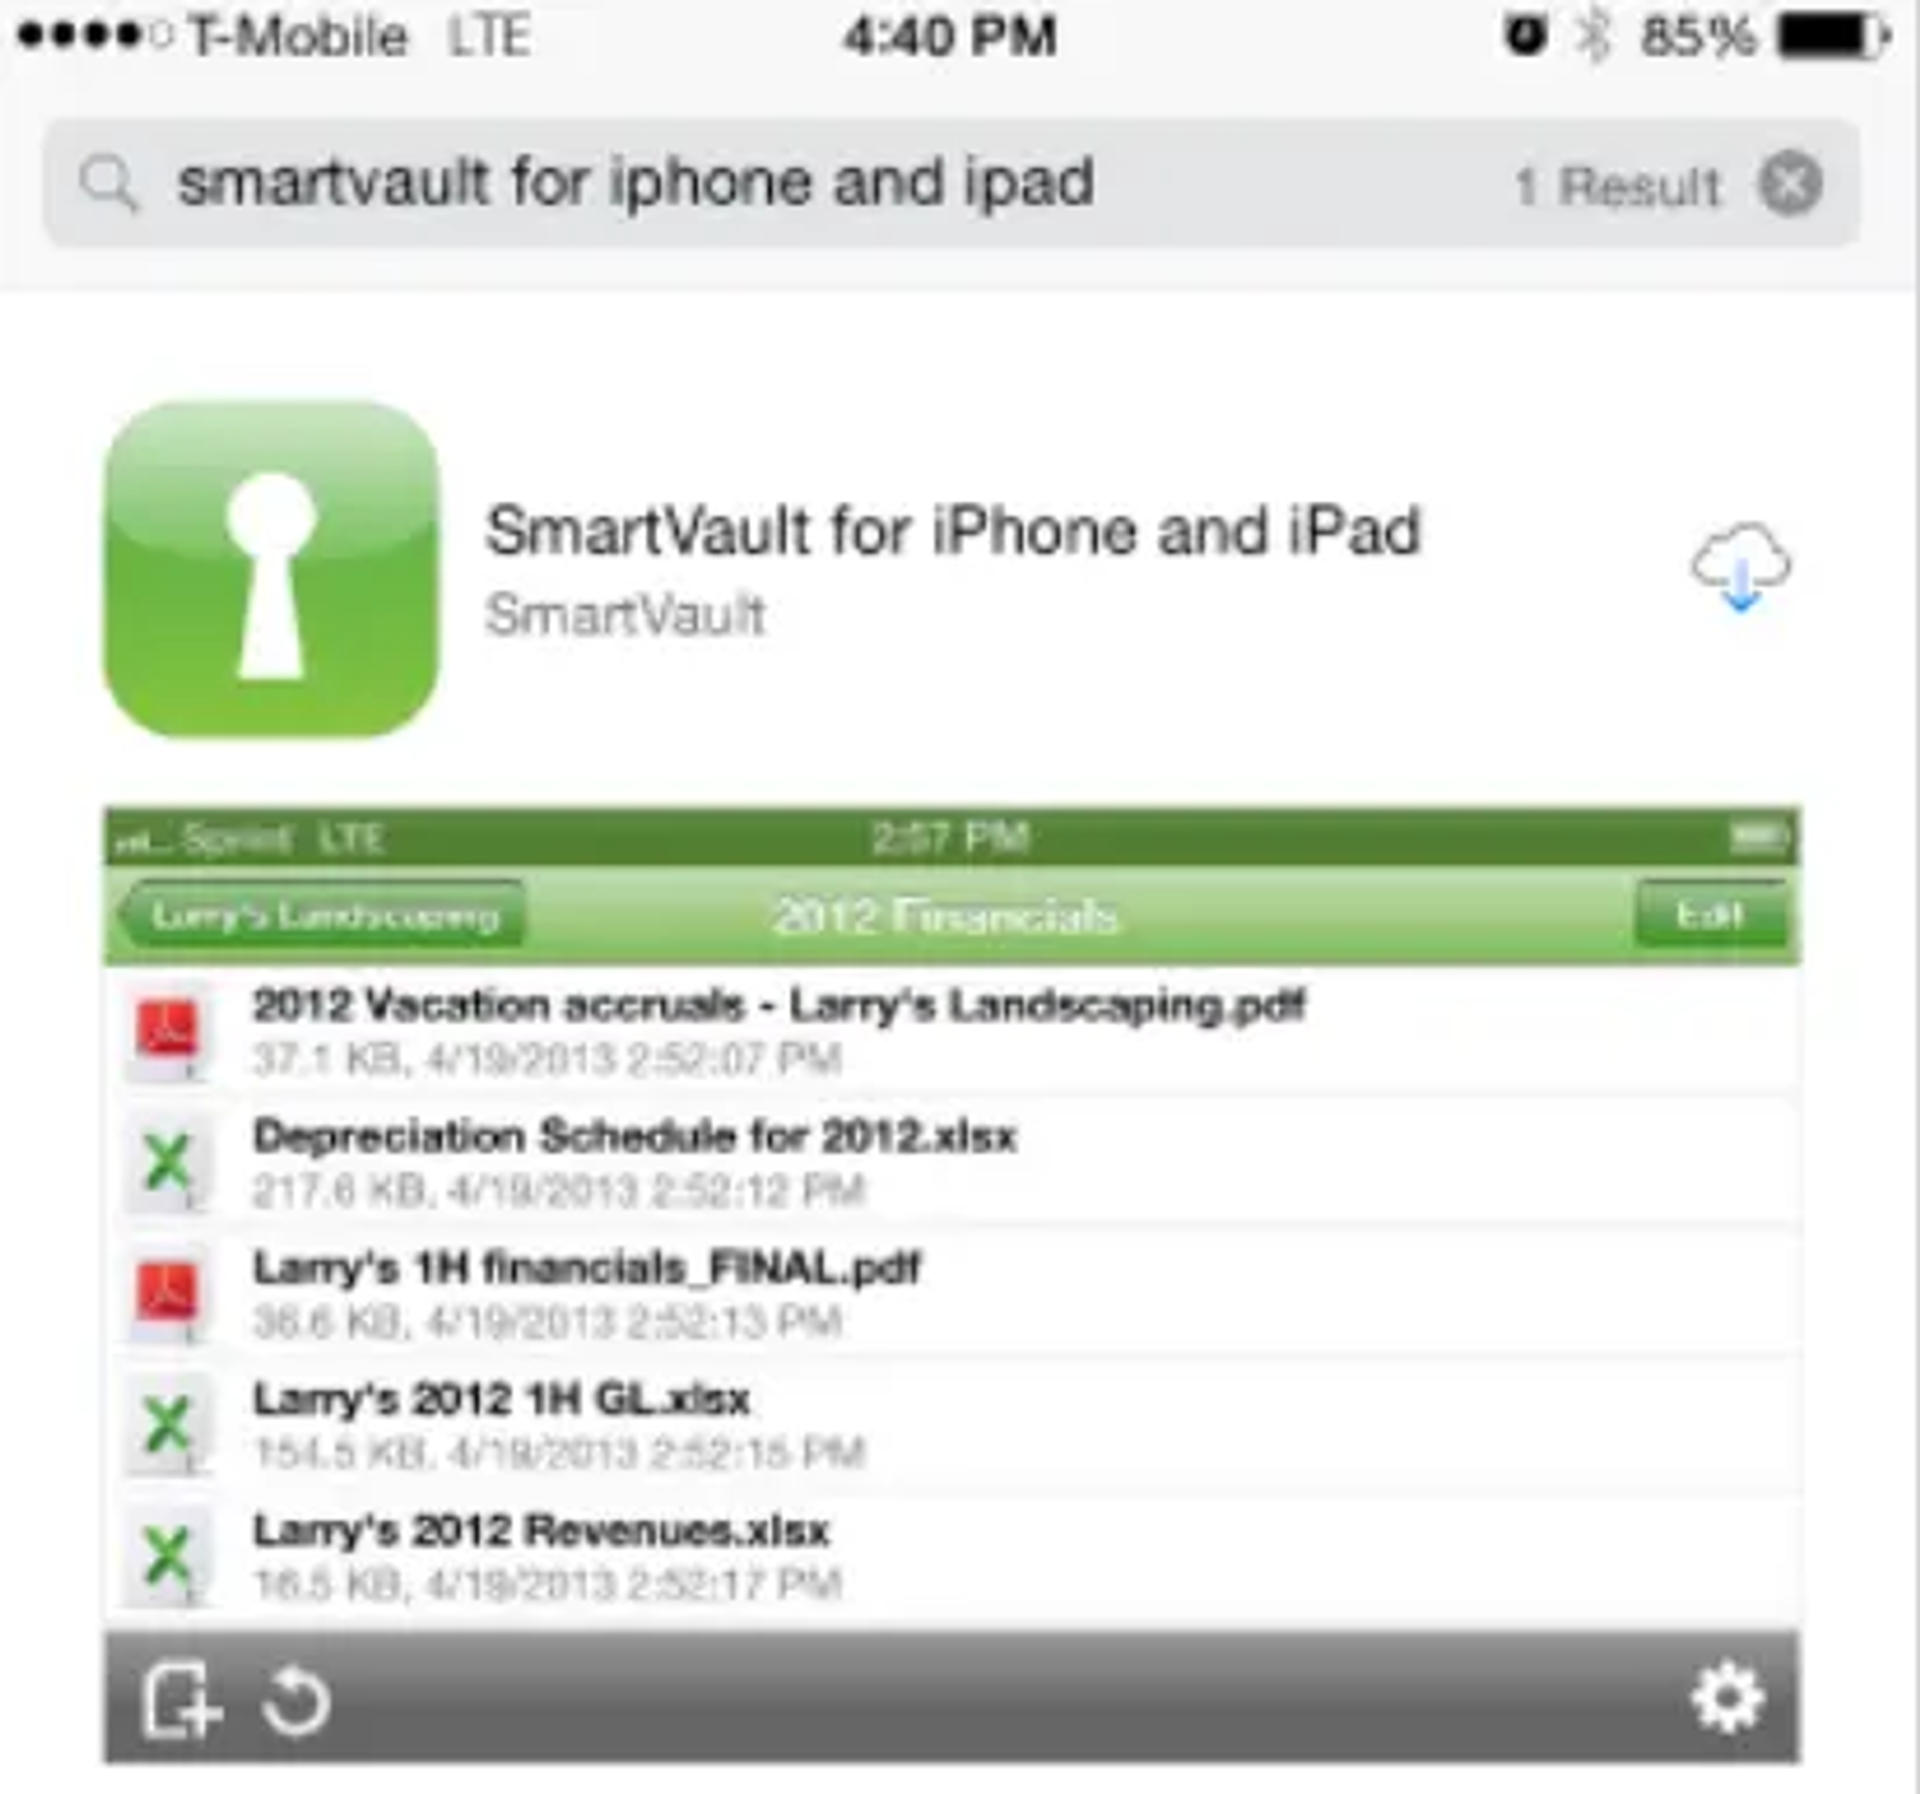
- First open the App Store on your device—iPad or iPhone.
- In the Search field, enter smartvault, and select smartvault for iphone and ipad in the search results list.
- Select SmartVault for iPhone and iPad.
- Install the app. You may need to enter your Apple ID and password.
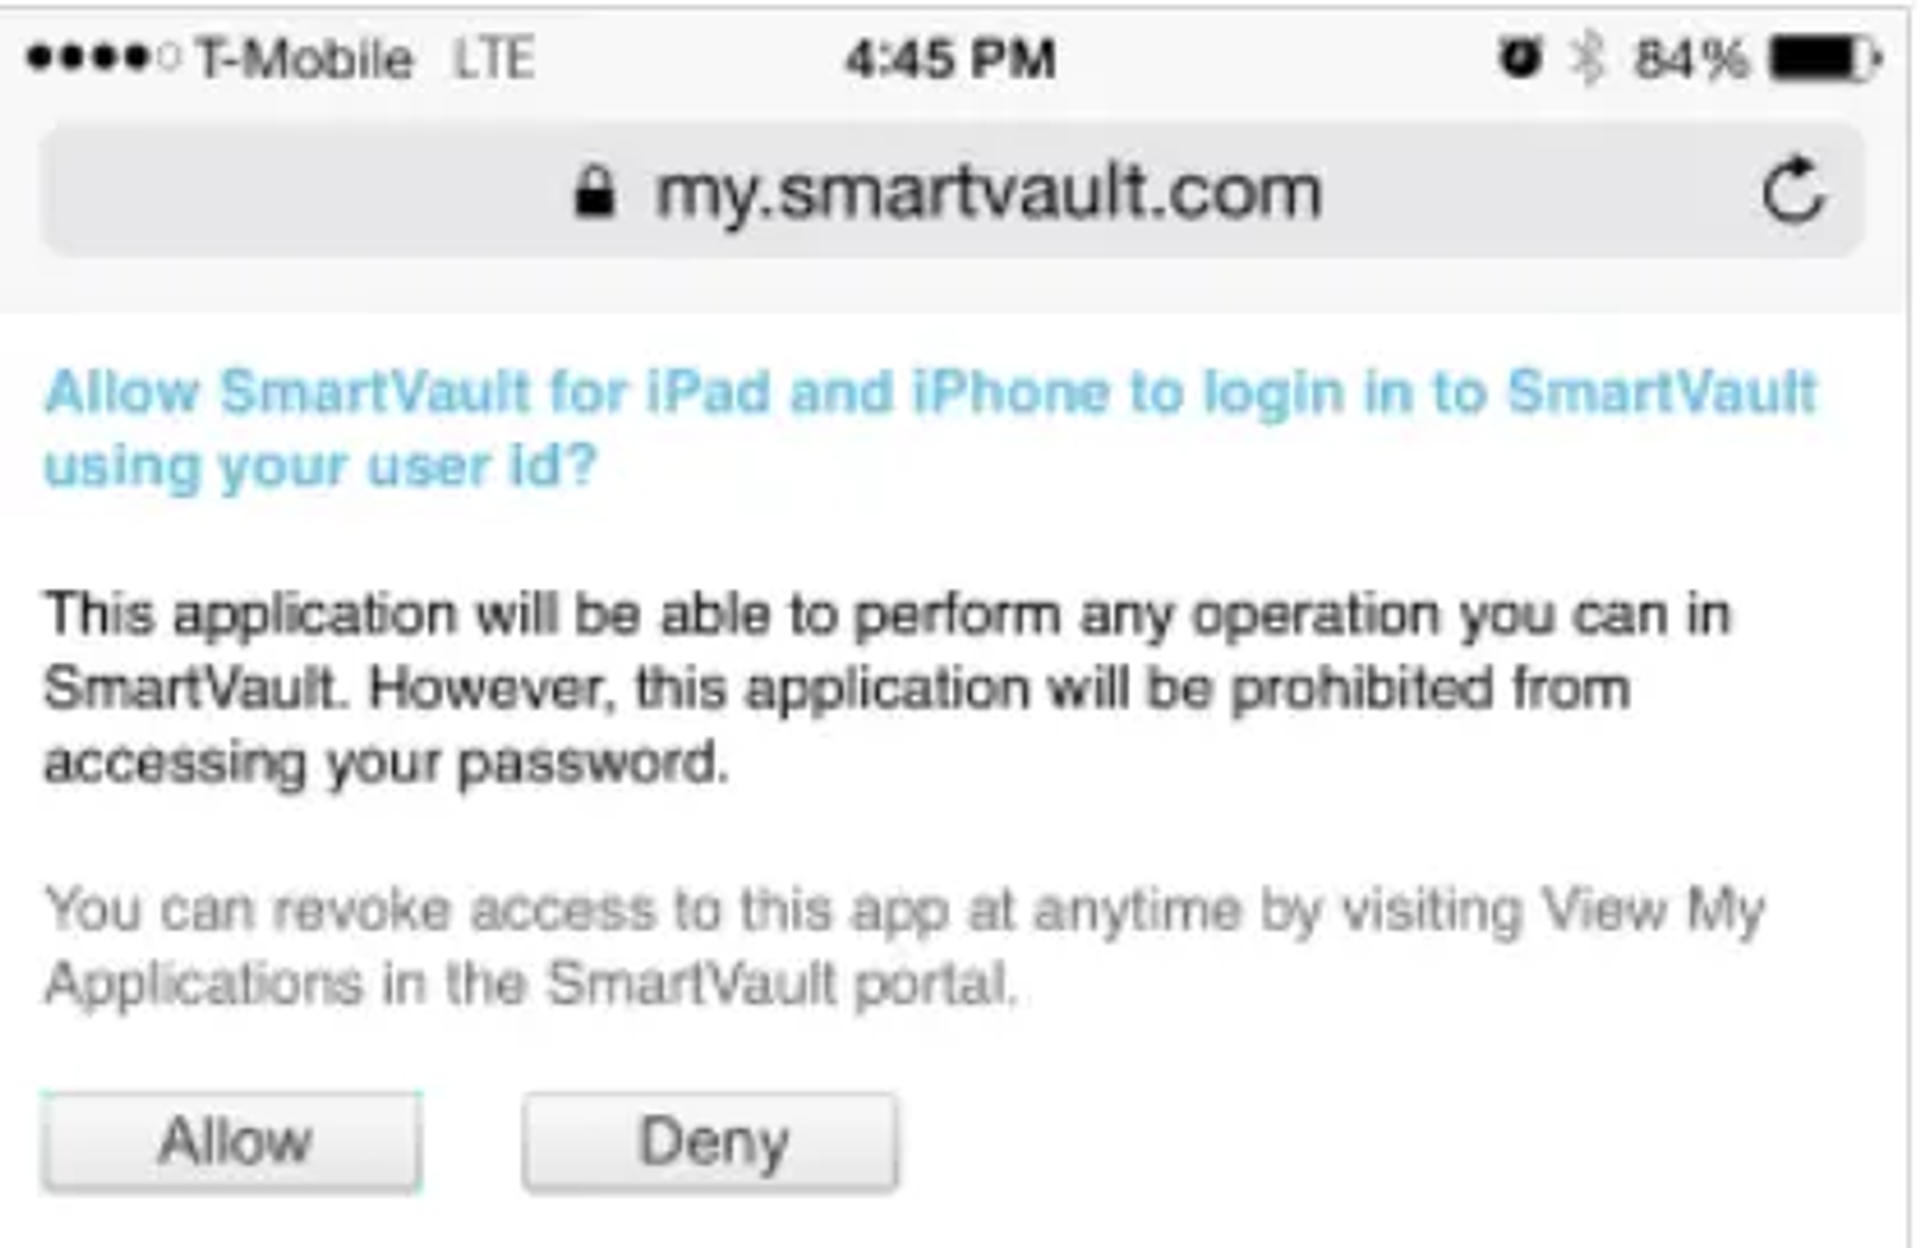
- Open the SmartVault app.
- Tap Sign In to give the app permission to use your SmartVault account.
- Enter your email address as your SmartVault user ID and password that you want to set, and then tap Sign In.
- Tap Allow granting the SmartVault app access to your SmartVault account.
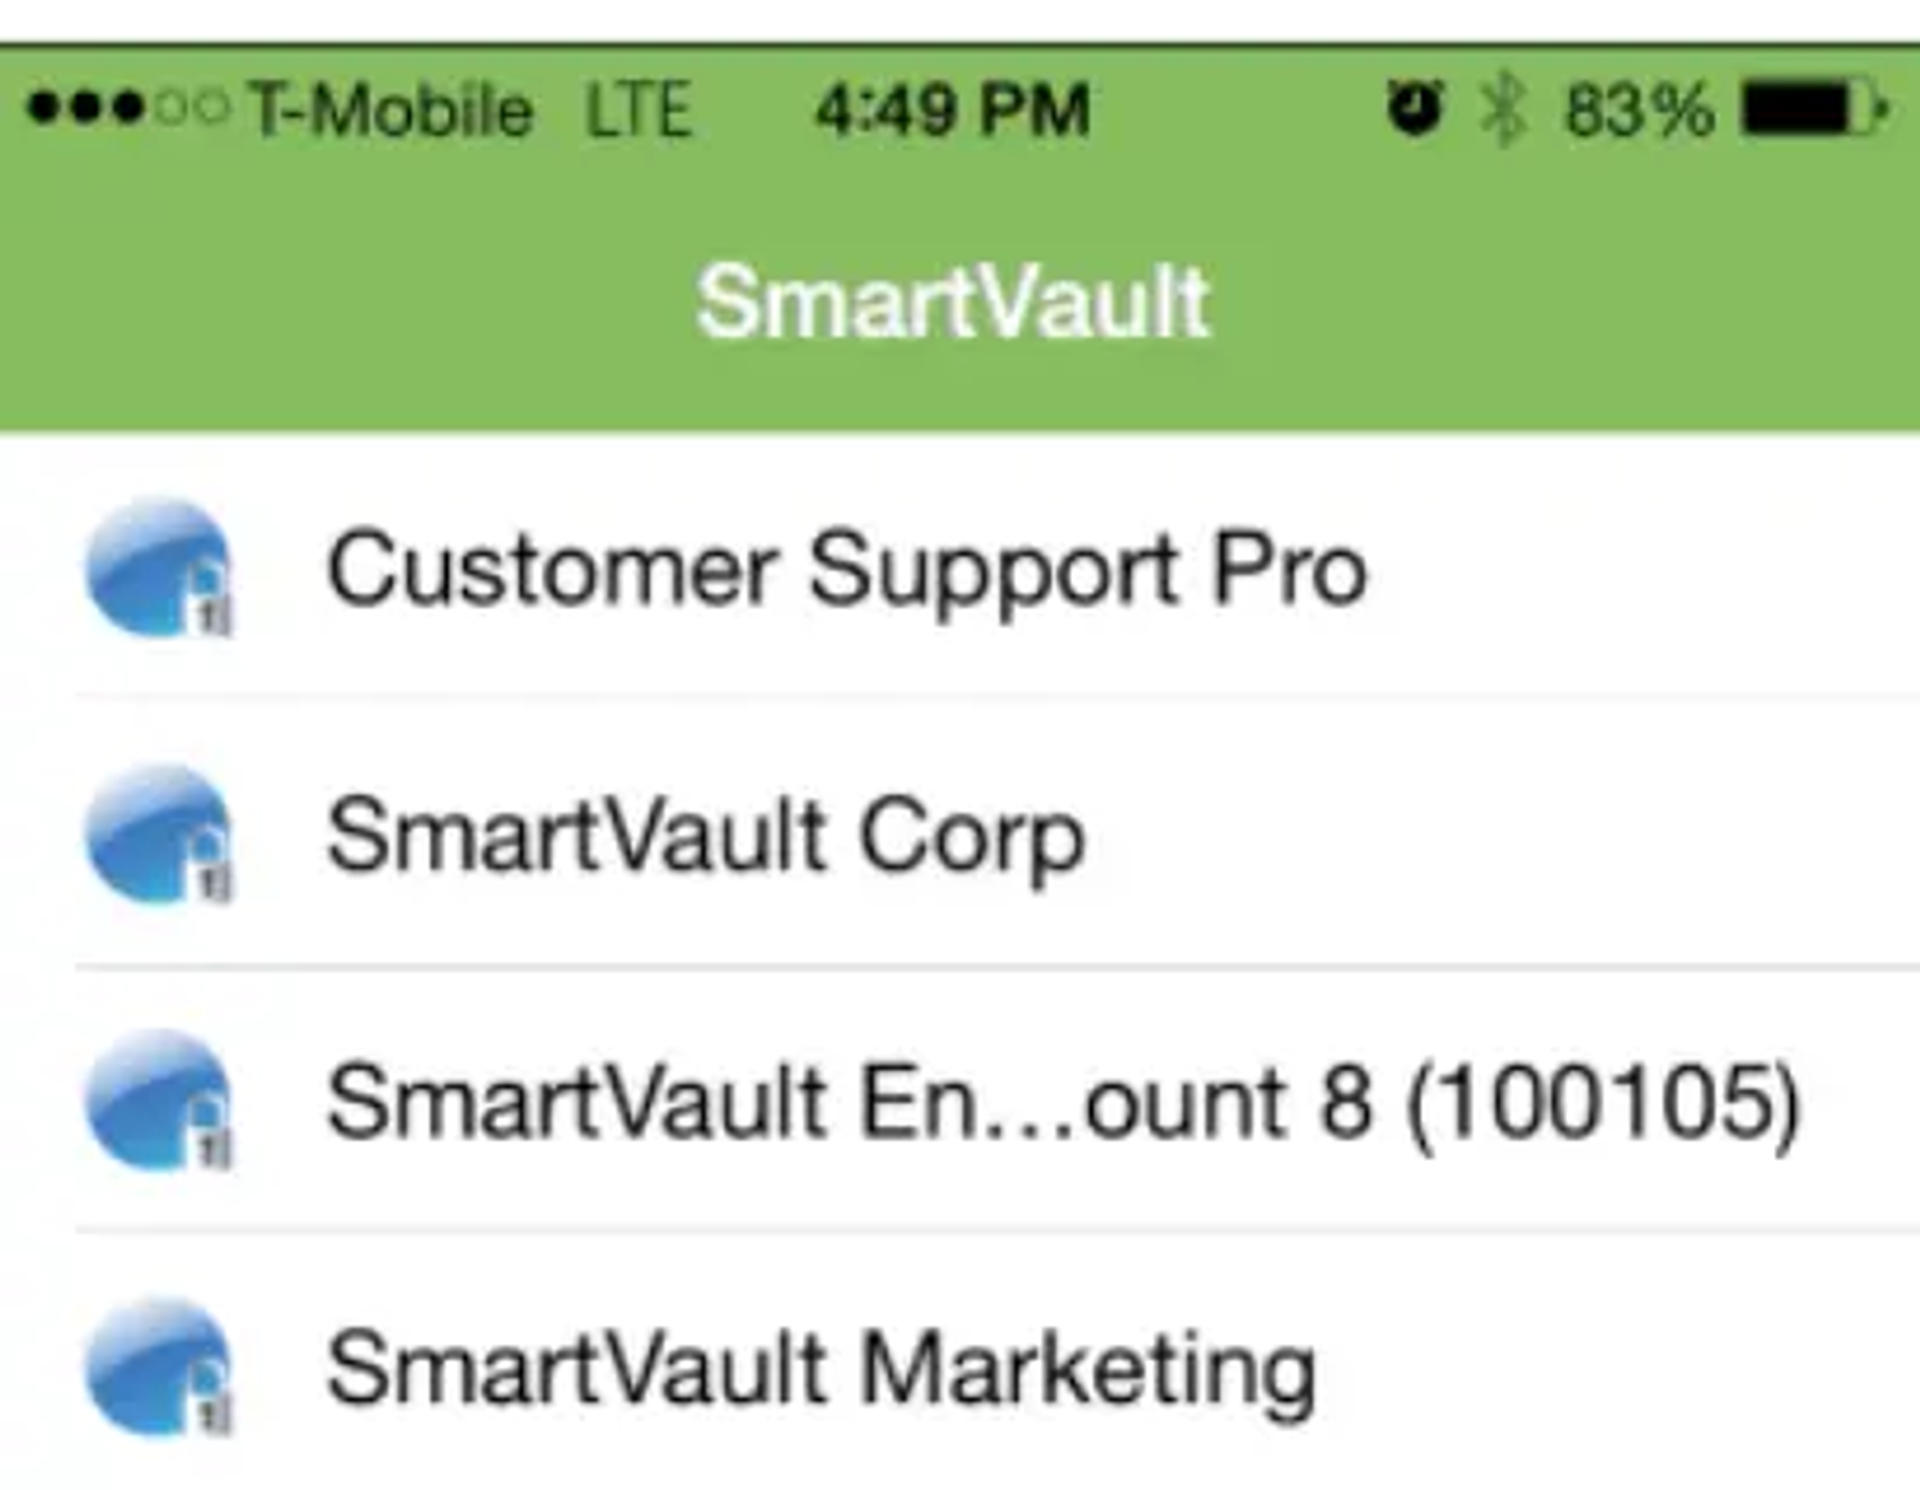
- You may need to connect your account to the app. If the window below appears, copy the PIN displayed in the User PIN field.
- Paste the User PIN into the field at the top of the window, and then tap Go.
- Tap Set SmartVault Passcode.
- Enter your passcode, and then re-enter it.


NOTE:
For security reasons, We as well as SmartVault strongly recommend that you set a SmartVault passcode lock. This ensures that any unauthorized users are not able to access your documents in SmartVault in the case of losing your iPad or iPhone.


Now everything is done and your iPad or iPhone is configured for using SmartVault!
How to Use SmartVault with Google Android Device?
The graph in the image below shows what type of users can use Android apps:

Please keep in mind that Only users like Administrators, Employees, Seasonal users, and Client can use Google Android apps. Moreover, Guest licenses cannot use the feature of WebDav.
Using SmartVault with a WebDAV Application on a Google Android Device
- Go to Google Play Store at https://play.google.com, and then in the Search field, type WebDAV and search for an Android app that supports WebDAV.
- Check the list of available Android apps that support WebDAV, and then install the one that best fulfills your needs.
- After you have installed an Android WebDAV app, use the following settings to connect to your SmartVault account:
- Once you connect to your SmartVault account, you can then securely browse your accounts, folders, vaults, and documents.
Go to SmartVault URL or Server https://docs.smartvault.com and enter your SmartVault email address and password.
(NOTE:
Please keep in mind that SmartVault uses secureHTTPS://)
SmartVault Versions and Pricing Options
For your better understanding about how much SmartVault costs, we will try to present the pricing and user benefits in a tabular form so that you can get a side-by-side comparison of things in the clearest way possible.
| Version | Standard | Business Pro | Accounting Pro | Enterprise |
|---|---|---|---|---|
| Type of Users | For teams who want to store and share documents securely on the cloud. | For businesses that need advanced security as well as heavy document workflow. | For accounting firms that need a secure client portal along with advanced workflow and integrations. | For large companies that want customized product features, onboarding, customer support, and scalable pricing. |
| Minimum User | Minimum 5 Users | Minimum 2 Users | Minimum 2 Users | Minimum 10 Users |
| Monthly Price | $28/per user/month billed monthly | $56/per user/month billed monthly | $56/per user/month billed monthly | You need to call SmartVault support 866-404-1337 for a custom quote. |
| Benefit's |
|
|
|
|
SmartVault Alternatives
There are a number of alternatives for the SmartVault software, you can say, SmartVault competitors. We have reviewed and analyzed many of them. We will introduce you to the top 5 of them here.
 LogicalDOC
LogicalDOC is one of the popular document management systems (DMS) that help organizations manage their documents. It's focussed on automating business processes and speeding up content retrieval. The leading DMS allows you to create, collaborate, and manage documents as well as store valuable organizational data in a centralized document repository.
Pricing Details:
Pricing depends on the number of users and license type.
Free Version: Free Version available.
Free Trial: Free Trial available.
 Hubdoc
Hubdoc is also a document management system that is capable of importing your financial receipts or documents, converting them into data, and storing them in one place that you can use at any time. Hubdoc captures your documents easily.
Through their mobile application, you can take photos, scan receipts or other financial documents, or use email. Hubdoc then does the data entry part by reading key information from receipts or documents and then turning that information into usable data. Your accountant can access all the data directly from Hubdoc.
Pricing Details:
Starting Price: $12 per month
Free Trial: Free Trial available.
 ShareFile
Developed by Citrix Systems, ShareFile is a data sync, content collaboration and file sharing software program that supports all document management tasks. It perfectly integrates with many workflow tools, for example, MS Outlook, etc. and offers a great user experience. The developer of the software also provides on-premises as we as cloud-based storage solutions, client portals and virtual data rooms that fulfills the workflow requirements of small and large businesses.
Pricing Details:
Starting Price: $50 per month
Free Trial: Free Trial available.
 Zoho Docs
Zoho Docs is an integrated online solution that provides comprehensive online file storage and document management capabilities. It has two distinct features—document editing and collaboration as well as document storage and management. The software allows you to access, manage and share files, documents, images, and videos across multiple internet powered devices anytime anywhere.
It also offers a bunch of other features, for example, reviewing and tagging, check-in and check-out control, user management, online chat and collaboration, data backup, and seamless integrations with Google Apps as well as Zoho's other solutions, for example, Zoho CRM, Zoho Recruit, Zoho PRojects, and Zoho Mail.
Pricing Details:
Starting Price: $5.00/month/user
Free Version: Free Version available.
Free Trial: Free Trial available.
 FileHold
FileHold is one of the best document management and document workflow software solutions that assist large enterprises with a smooth transition to a paperless environment. Having a free fully documented API, it offers a range of great features, such as document scanning, document linking, searching, versioning, indexing, and many more. The software is compatible with mobiles and also offers a perfect desktop environment by supporting all types of browsers. It easily integrates with MS Office, Teams, SharePoint, and Active Directory.
Pricing Details:
Starting Price: $15.00 / user / month
It can be bought as a perpetual license or on a month to month subscription (minimum of 5 users).
Free Trial: Free Trial available.
How to Contact SmartVault Customer Service?
SmartVault offers great technical support to customers through almost all conventional and modern support channels—phone, email, chat, contact form, etc. You can choose any channel that feels most comfortable to you.
1. For existing SmartVault customers:
US: 888 607 4275
UK: 0122 375 3906
2. For contacting the sales team:
US Toll Free - 866 404 1337
UK Toll Free - 01223 735 906
3. Alternatively, you can submit a request through the contact form by clicking on the following link: https://help.smartvault.com/hc/en-us/requests/new#_ga=2.113342215.1033382874.1650885619-281092305.1650885619 (You will get response from them in 1-2 business days)
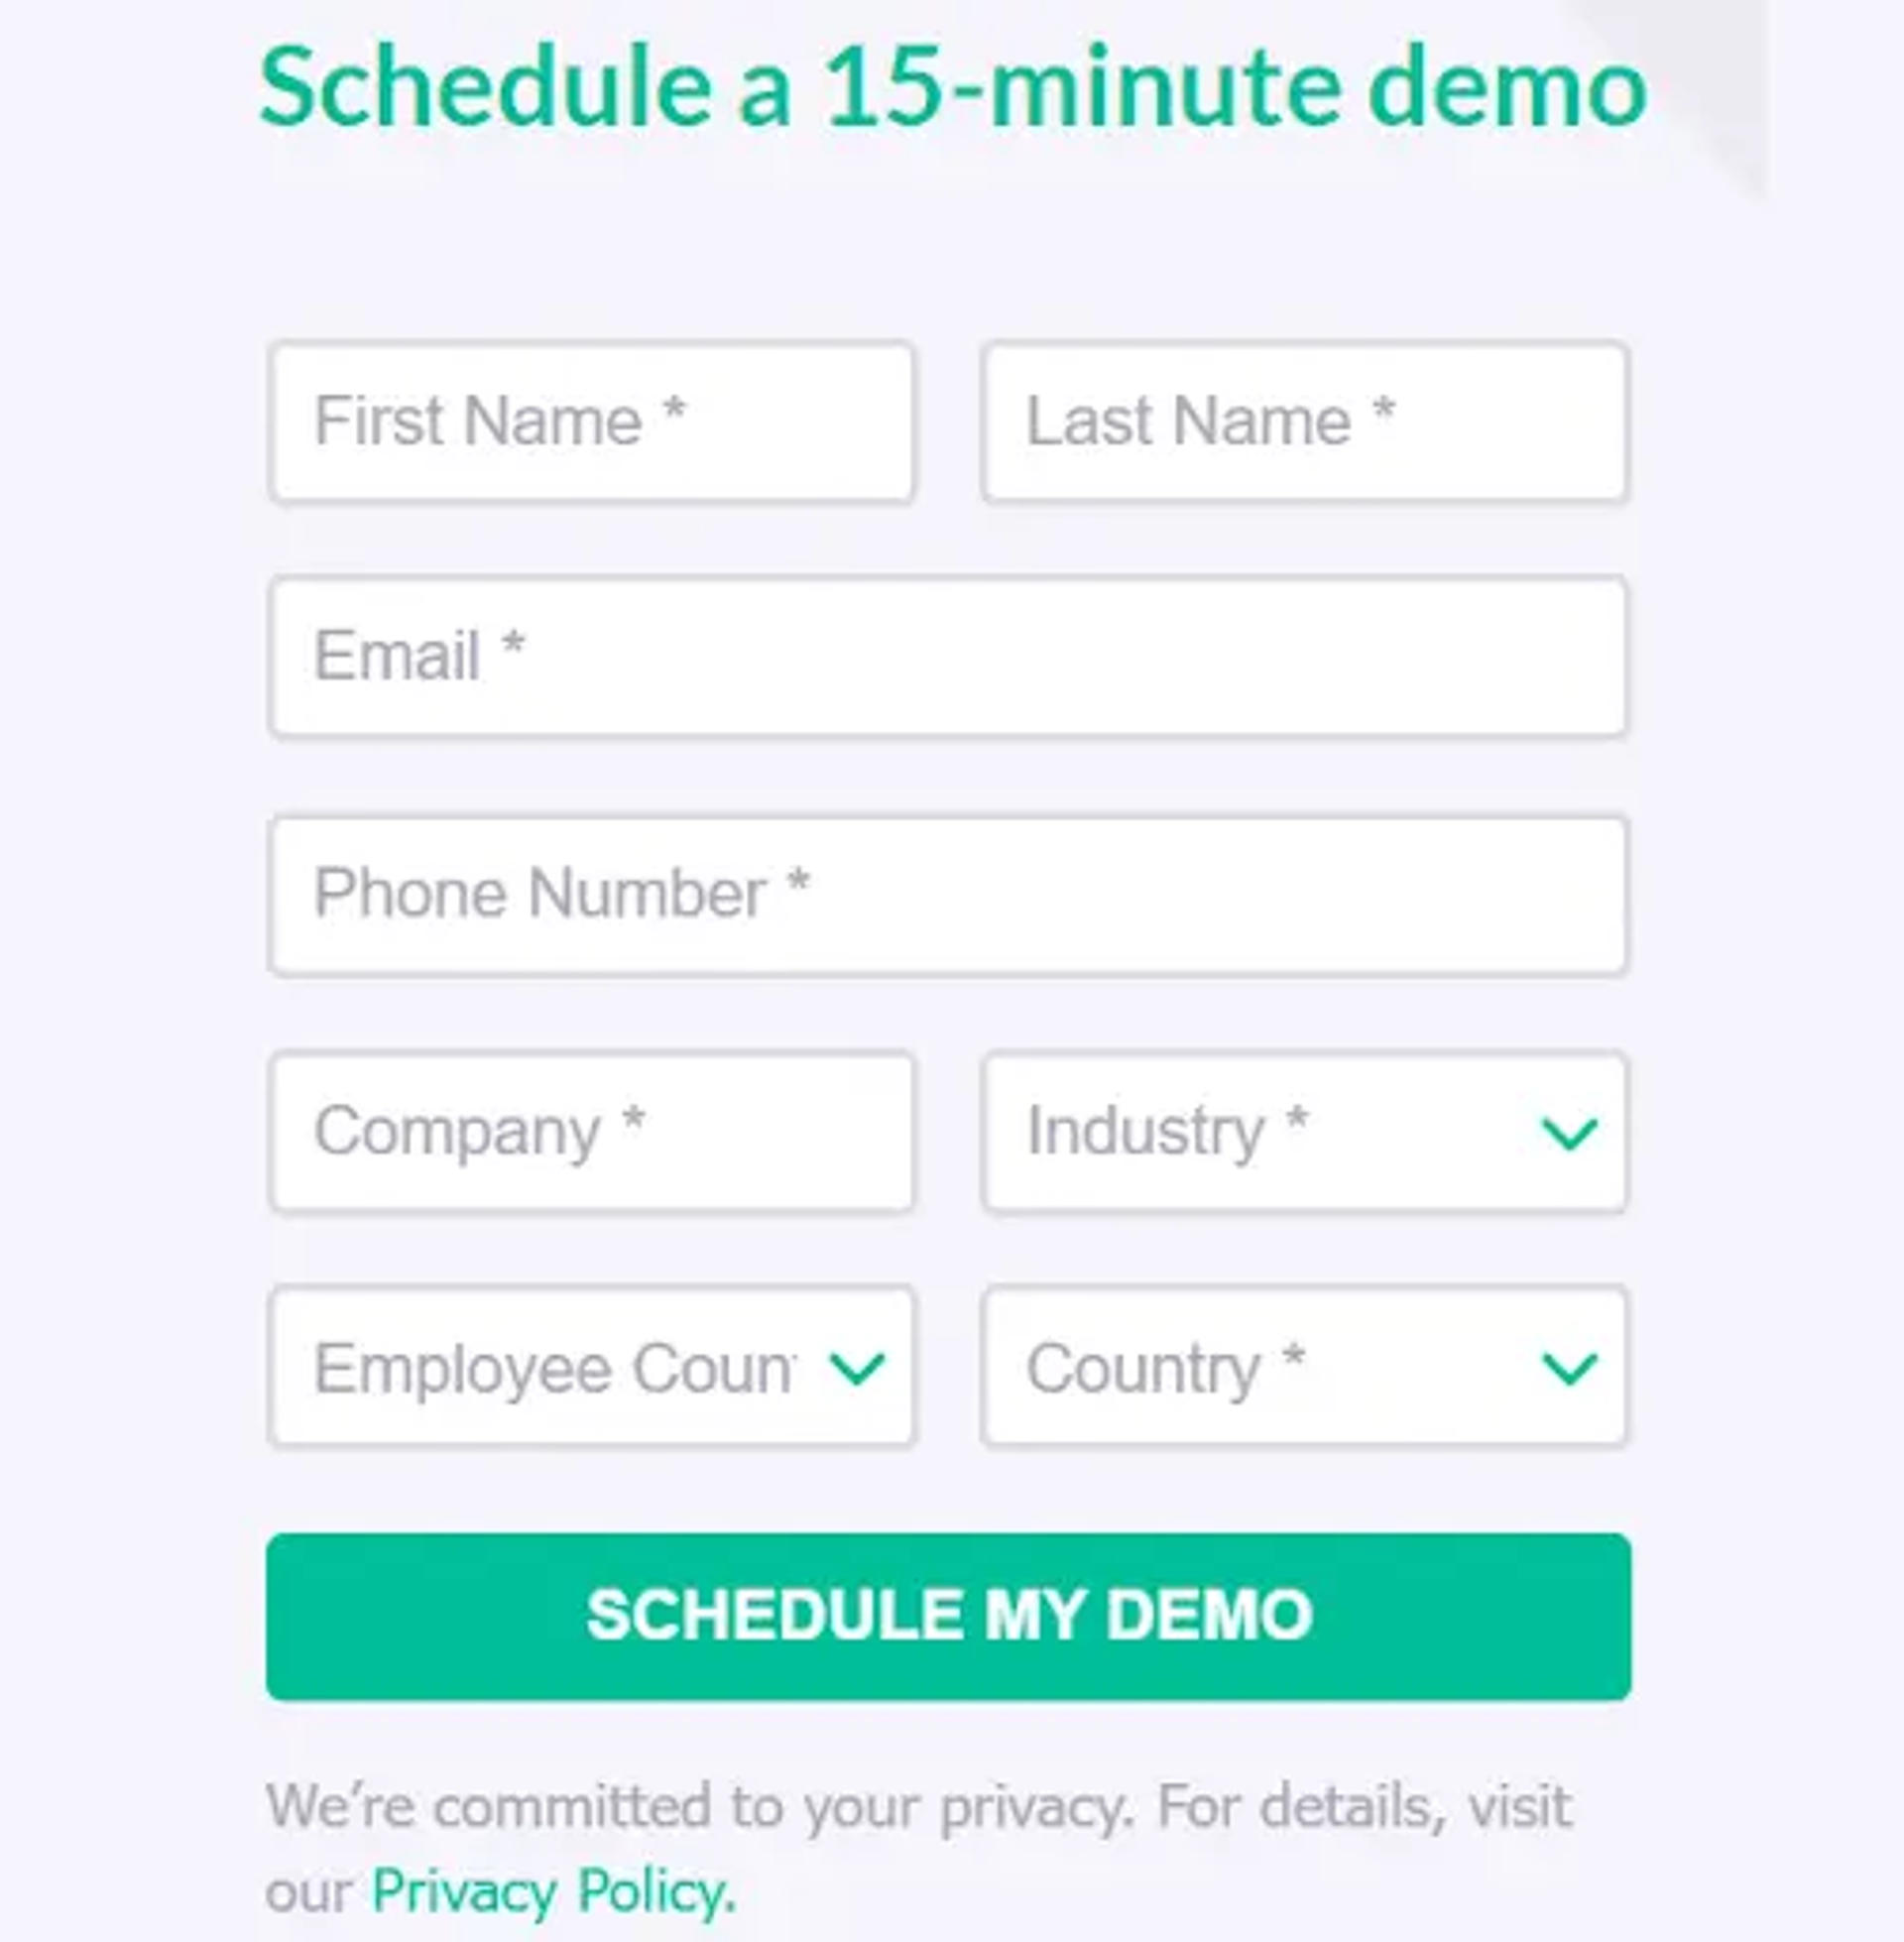
4. Also, you can schedule a 15-min live demo to know how martVault works for you through this link https://www.smartvault.com/see-a-demo/ Clicking on the link opens a window like the one given on the side
5. The direct link to jump to all the support channels is: https://www.smartvault.com/contact/
We have cleared up so many things concerning SmartVault software that you actually need to be familiar with; now you know what SmartVault is, how it works, what its salient features and usability, integrations, pricing, and alternatives are, and many other things.
We believe you would now be feeling fully confident of making an informed decision if you have been thinking about opting in SmartVault. Even if you are an existing user of SmartVault, you will now be an intelligent and informed user of the tool.
However, if you still feel we have left something that you wanted us to describe here, you can easily contact us any time. Our experts will help you with the most suitable solutions to any of your issues.
SmartVault FAQs
1. How to add an employee to SmartVault?
Kindly follow the steps given below to add an assigned employee to SmartVault
- Sign in to the SmartVault Portal.
- Click the Manage Employees button.
- Click the + Add Employee button....
- Enter the employee's information and select Assigned Employee....
- Ensure the checkbox for Invite Employee is enabled if you want to invite the employee and click Save. This action creates the employee and sends an activation email to the user.
- The designated employee needs to activate their account to start using SmartVault.
NOTE:
In case you don't have any active licenses in your SmartVault account, the + Add Employee button will appear deactivated.
2. How to invite clients to your SmartVault account?
If needed, you can provide your clients with access to your SmartVault account so that they can download their tax return documents or upload any documents if required.
Each of your clients will have an individual vault in SmartVault. However, they will only be able to view and access folders within their vault. But they cannot perform any edits.
When deciding when to invite a client to SmartVault account, just keep the following in mind:
You may want to invite all of your clients at once when you set up your SmartVault account.
You can also invite your clients when you need to collect some source documents (such as W-2s). This way your clients can upload the requested documents directly to the Client Source Documents folder.
NOTE:
You can remove a client's access to SmartVault at any point in time you want to. For more information, see other questions “How to remove a user's access to SmartVault, specific folders/vaults?” and “How to remove a user's access to groups?”.
3. How to send invites to clients from the SmartVault Portal?
For inviting one or more clients to your account from the Portal, follow the steps below:
- Sign in to the SmartVault Portal.
- Click Clients on the left-hand menu.
- Select the clients that you want to invite and click the Invite Client icon.
- You will be prompted to confirm that you want to invite clients. Click OK.
- Review the confirmation message, and then click Close.
NOTE:
If you have your View Preferences set to ’2020 New View’, follow the Steps in Client Management.
NOTE:
If you want to invite more than 50 clients, you will have to navigate to the next page of clients to continue inviting additional clients.
4. How to send invites to clients from the Connected Desktop?
- Open the Connected Desktop.
- Select and right-click on the client you wish to invite and then select Open client in Portal. Your browser will display the Client Info page in the Dashboard.
- Click the Invite Client icon at the top left of that screen. The status window will inform you if the invitation was submitted.
- Click Close.
5. How to resend an invite in SmartVault?
- Sign in to the SmartVault Portal.
- Go to the Clients page…
- From the Clients page, locate the client and click the i icon.
- Click the Invite client icon on the top left corner.
- You then see a confirmation that will tell you if it has been submitted or not.
- Refresh the page now. You will see the client's status that lets you know that they have not been invited, invited, or activated with SmartVault.
NOTE:
If you have your View Preferences set to ’2020 New View’, follow the Steps in Client Management.
6. How to remove a user's access from SmartVault, a specific folder/vault, or a group?
Whenever an administrator wants, they are able to remove a user from their SmartVault account or remove a user's access to a specific folder/vault or a specific group.
Removing a User from Your SmartVault Account:
When you wish, you can remove a user, guest or client from your SmartVault account.
- Sign in to the SmartVault Portal.
- Click on your initials on the top right.
- Click Settings.
- Under Manage Groups, select Licenses
- Click Remove next to the user's email address and then OK.
Removing a User from a Specific Folder or Vault:
- Sign in to the SmartVault Portal.
- Click Files and Folders.
- Go to the folder or the vault you want to remove the user from and then click the Container properties icon.
- Click the Access and Notifications tab, and then click Edit Access Settings.
- Click the X icon under the Remove column to remove that user's access to the folder or vault, and click Save Settings.
NOTE:
If you have your View Preferences set to ’2020 New View’, visit the section Item Properties of Navigating the New Files and Folders View to learn how to access the client's vault properties.
NOTE:
If the color of the X icon is gray, it means that the permission for that particular user was granted from the Folder Template level. In this situation, the only way to remove the permission for that user is removing them from the group from the vault level.
Removing a User From a Group:
- Sign in to the SmartVault Portal
- Click Files and Folders.
- Just go to the folder or vault you want to remove the user from and then click the Container properties icon.
- Click Manage Group Members.
- Select the appropriate group tab and find the user to remove.
- Click Remove and then click Save Changes.
Group permissions are set at the vault level. Therefore, to remove a user from a group:
7. How to resend an activation link without access to the dashboard?
If you do not currently have access to the SmartVault Dashboard, you can still get the invitation resent to you by approaching the SmartVault Support Team.
Alternatively, you can also go to the SmartVault Portal and put the email address of the person you want to invite.
Enter a random password and try to sign in no matter if they have never created a password. The system will check and see if the invitee has activated their account earlier. And if not, the system will automatically resend them an invitation to SmartVault.
We are including a screenshot below for you to understand how it may look when you resend an invitation via that method.

8. How to view the Activity Log for a vault or folder?
For the purposes of security and compliance, it's always important for you to regularly audit who has accessed your sensitive documents and files. At any point in time, you may want to know when somebody downloaded, uploaded, deleted, or changed any document's properties or who made changes to access settings on a vault or folder.
The Activity Log just fulfills that purpose.
Know who can view the Activity Log
The Activity Log is offered with all SmartVault plans except Basic 2016 and Team 2016. It comes with all SmartVault Tax and Accounting plans as well as the Professional 2013 and newly launched Pro plans.
Viewing the Activity Log
- Sign in to the SmartVault Portal.
- Select Files and Folders.
- Navigate to the account, vault, or folder for which you want to view the Activity Log.
- Click the Properties icon (gear icon) for the account, vault, or folder and select the Activity Log tab.
- Click the Edit filters icon and select the types of users for which you want to view the activity log.
- Select All if you want to view activity for all users, guests, and clients.
- Select Users if you want to view activity for only client users.
- Select Guests if you want to view activity for only guest users. In a Tax Plan, tax clients use a Guest license.
- Select Guests+Clients if you want to view the activity log for only guests and clients.
- Select Clients if you want to view activity for only clients.
- In the Date Filter section, use the calendars to select the Beginning date and Ending date.
NOTE:
SmartVault recommends selecting no more than three months. - If you have selected a vault or folder and want to select all subfolders' activity, enable the Include subfolders' checkbox.
- Once you click Apply. SmartVault will display the activity log for all the selected items.
- If you wish to export the activity log to a CSV file, click the Export to CSV icon
9. What are Vaults, Containers and Folders in SmartVault?
Vaults, also called Containers, and Folders help you organize the documents you store in your SmartVault Portal.
Just like a locked online file cabinet, a Vault is a safe and secure online container that you can utilize to securely store your document online.
Vaults hold Folders inside them. Once you have created a vault, you can also create folders as well as subfolders in that vault. It helps you further subdivide and organize all of your documents.
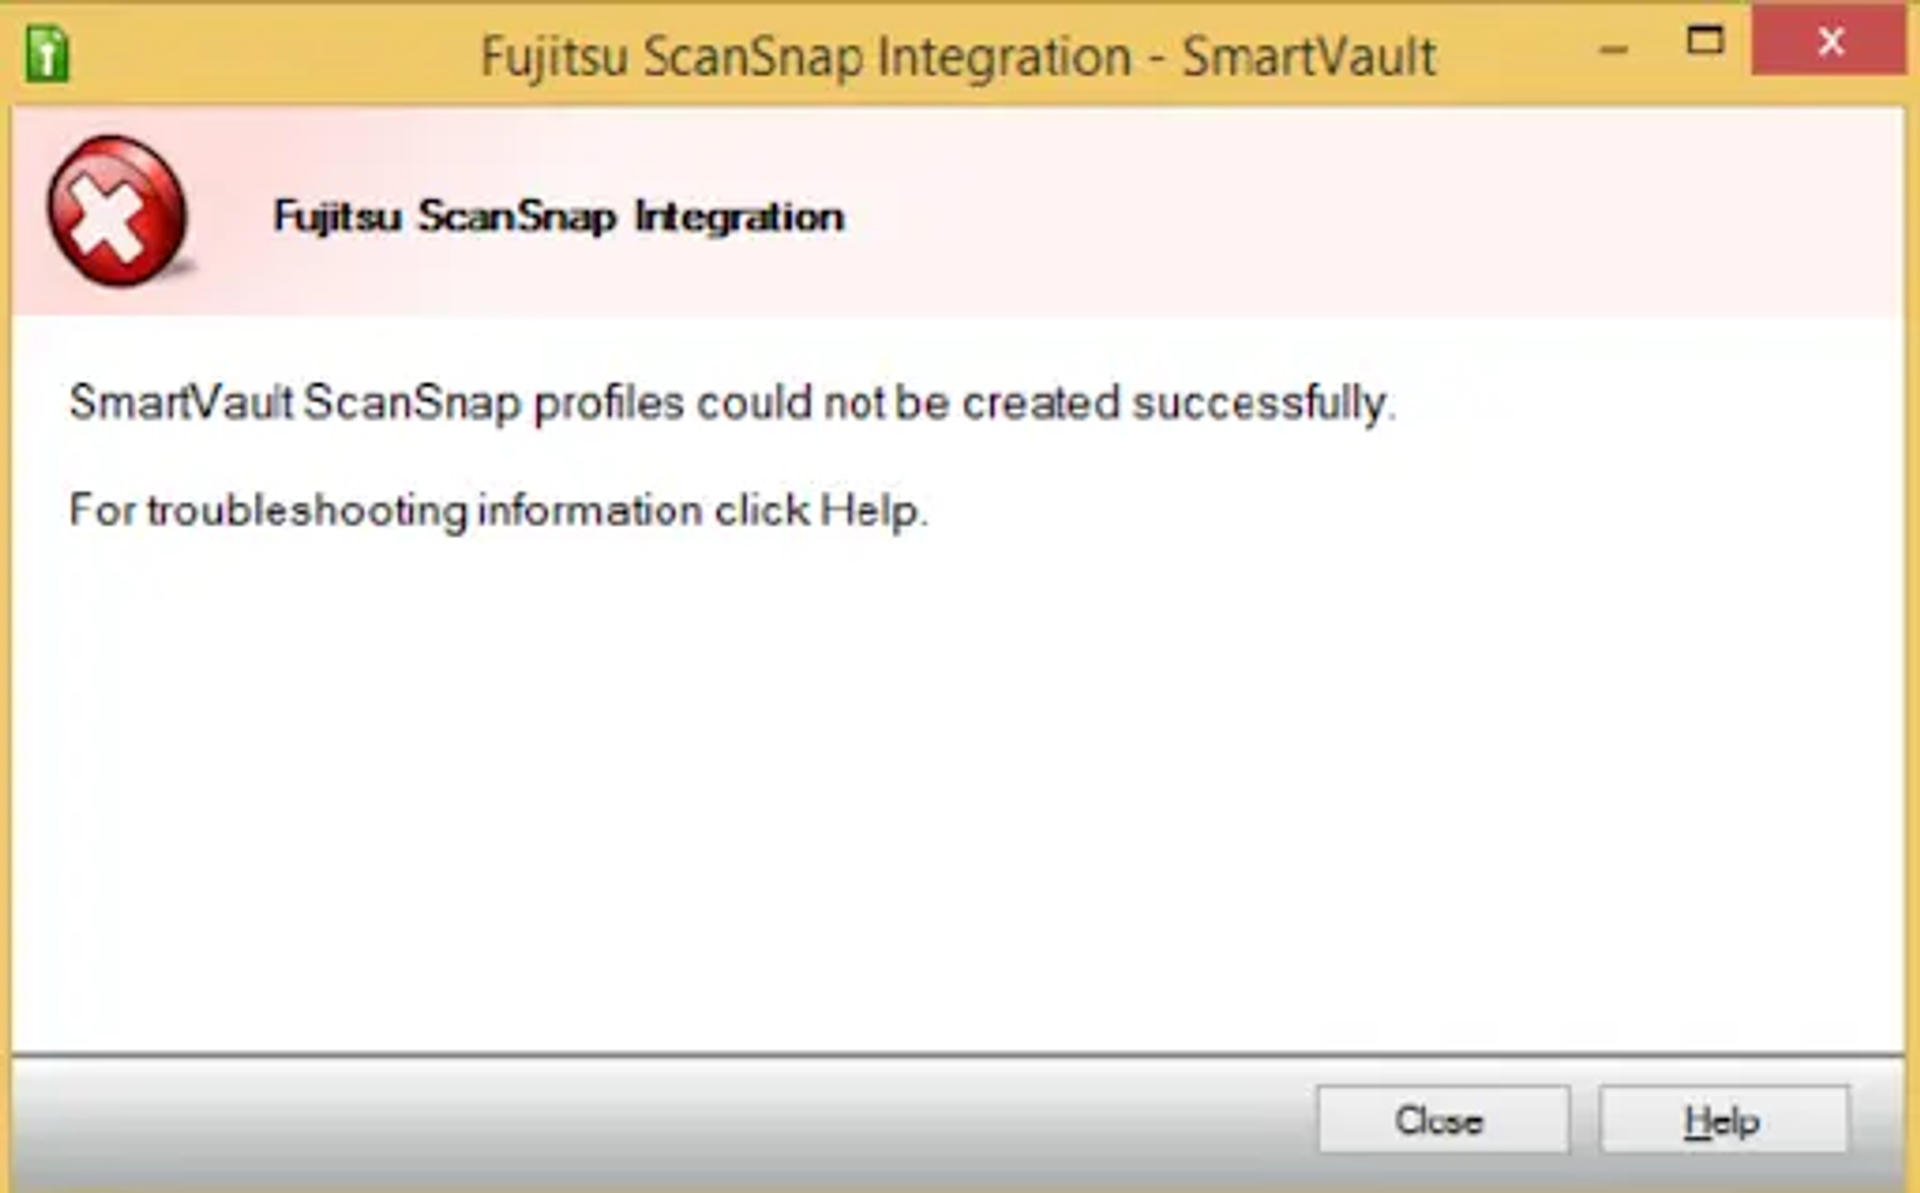
10. How to configure a scansnap scanner with SmartVault?
If you want, you can configure a Fujitsu ScanSnap scanner with SmartVault, and you can use the same to scan documents directly to the SmartVault Toolbar, the Connected Desktop, or the SmartVault Inbox..
However, it's a prerequisite that you install the ScanSnap software first. If you have not ScanSnap software installed on your system, you will receive this error:
Also, make sure your SmartVault Desktop client is installed and is in working condition.
For more information on how to work with a ScanSnap scanner, you can open the related links mentioned below:
- How to get started guide contents for tax accountants?
- How to scan documents using the smartvault quickbooks toolbar and a fujitsu scansnap scanner?
- How to scan documents using the smartvault inbox and a fujitsu scansnap scanner?
- How to scan documents using the smartvault connected desktop and a fujitsu scansnap scanner?
- How to understand and create full-text searchable documents?
- How to create multi-page PDFs or single page PDFs with a scansnap scanner?
Supported Scanners
SmartVault supports ScanSnap models S300, S1300, S1500, and iX 500.
In case you are using an old model scanner, or if you receive an error while trying to create the ScanSnap profiles automatically, find out how to create the SmartVault ScanSnap profiles manually.
Configuring a Fujitsu ScanSnap Scanner
- Open the SmartVault Launchpad and sign in when prompted.
- Now, click Fujitsu ScanSnap Setup in the Launchpad.
- When you get to the ScanSnap integration window, click Create Profiles.
- Click Close. And then everything will be done.
11. How do I scan with SmartVault?
You can easily scan your documents using a Fujitsu ScanSnap scanner with SmartVault connected Desktop with the touch of a button. You need to follow these simple steps.
- Configure your ScanSnap scanner profiles for SmartVault if it is not yet done.
- In the system tray, right-click on your ScanSnap icon and then select Scan Button Settings.
(Please NOTE
Your scanner must have a connection to be used with the Connected Desktop. In case your scanner is not plugged in, the icon will appear with a red no symbol around it) - Under Profile, select SmartVault Toolbar, then click Apply, and then OK.
- Open the Connected Desktop.
- Click a client and then right-click on a folder within the client's vault. Click Scan.
- When the Scan Document window opens, feed the desired document into the scanner and press the Scan button on your ScanSnap scanner.
- Depending on which SmartVault tools are currently open, a dialog window will appear asking for the destination of your scan. Click Connected Desktop.
- The scanned document appears in the Scan Document window. Edit the name, description, or pages and click Save.
In case you need to manually create SmartVault Profiles for Fujitsu ScanSnap Scanners, click the link for instructions.
12. How to delete a Client from SmartVault?
Whenever you need to delete a client from your SmartVault account, you can simply delete the client vault attached with that particular client.
For your information: you can also recover a client's vault from the recycle bin for up to 90 days after the deletion. See Using the Recycle Bin for more information.
To delete a client's vault:
- Sign in to the SmartVault Portal.
- Click Files and Folders.
- From the left navigation, select the Container containing the client you want to delete. (If you have your View Preferences set to ’2020 New View’, visit the section Delete under Actions on Vaults, Containers, and Folders of Navigating the New Files and Folders View to learn how to delete a client's vault)
- Enable the checkbox next to the client you want to delete, and click the Send selected items to trash icon.
- A confirmation message appears confirming that all documents stored in this vault will be deleted. Click OK. And it's done.