 Microsoft office · Feb 23rd 2026 · 7 Min read
Easy Steps to Install Oracle SQL Developer on Windows
SQL Developer by Oracle is a free, user-friendly tool that empowers you to manage, query, and develop database applications. Whether you’re a seasoned developer or just starting your database journey, SQL Developer can be your trusted companion. We will guide you through each stage of the installation process of SQL Developer on Windows, ensuring you can get started quickly and efficiently.
In this guide, we will walk you through each step of the Oracle SQL Developer installation process on Windows, ensuring you can get started quickly and efficiently.
Simple Steps to Install SQL Developer on Windows
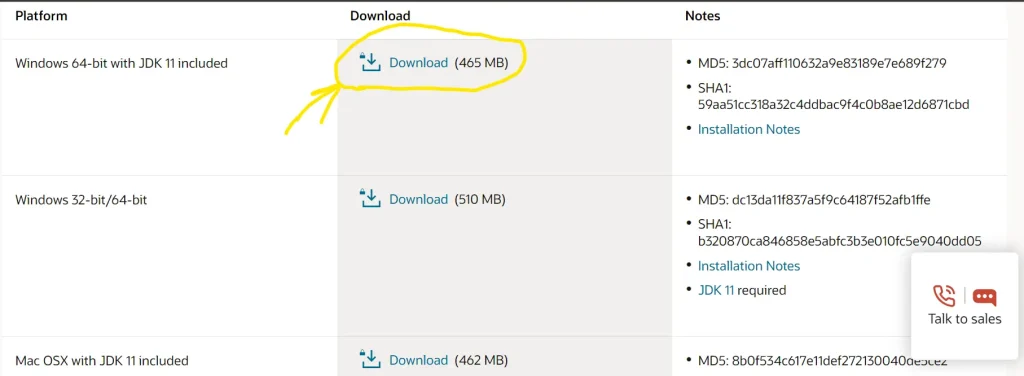
Step 1: Visit SQL Developer Download Page
https://www.oracle.com/database/sqldeveloper/technologies/download/
Step 2: Select the Version
Choose the version of SQL Developer appropriate for your Windows system. The “64-bit” version is typically recommended.
Step 3: Click on download link to start downloading the SQL Developer zip file.
Step 4: Sign In to Oracle Account or Create a new account.

Also Read: How to Download and Install SQL Server Management Studio (SSMS)
Step 5: Extract the Downloaded Zip File when download is completed

Step 6: Move the Extracted File in “C:\Program Files”.
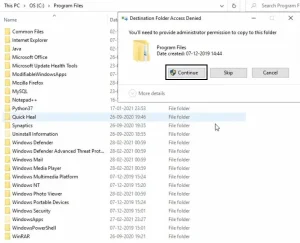
Open your computer’s Downloads folder. Cut and paste the extracted SQL Developer folder to a desired location on your computer, such as “C:\Program Files”.
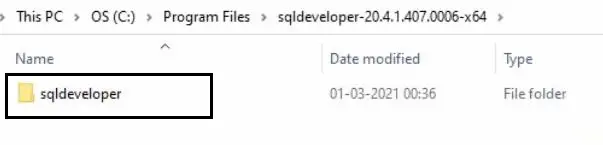
Step 7: Open the “sqldeveloper” folder inside the main SQL Developer directory.

Step 8: Locate the “sqldeveloper.exe” file within the folder. Right-click on it and select “Create shortcut.”

Step 9: Open SQL Developer now installation is started.

The installation is now successful, and you are ready to start using the software.

Also Read: Download SQL Server Express in Windows With Latest Edition 2022
Conclusion
Installing Oracle SQL Developer on your Windows system is a straightforward process that can significantly enhance your database management and development capabilities. By following these steps, you can quickly set up SQL Developer and start exploring its powerful features. Whether you’re managing large-scale databases or developing new applications, SQL Developer provides a robust platform for all your needs.
FAQs:
How to download Oracle SQL Developer for Windows?
To download Oracle SQL Developer for Windows, visit the official Oracle SQL Developer download page, select the appropriate version for your system, and follow the instructions to download and install the software.
How to setup Oracle SQL Developer on a local machine?
To set up Oracle SQL Developer on your local machine, extract the downloaded zip file, move the extracted folder to your desired location, and create a shortcut to the “sqldeveloper.exe” file. Double-click the shortcut to start SQL Developer.
Does SQL Developer come with an Oracle client?
No, SQL Developer does not come with an Oracle client. It is a standalone application that allows you to connect to and interact with Oracle databases without needing a separate Oracle client installation.
Is Oracle SQL Developer free?
Yes, Oracle SQL Developer is free to download and use. You can obtain it from the official Oracle website.
How do I install Oracle SQL Developer on Windows 10?
To install Oracle SQL Developer on Windows 10, download it from Oracle’s official website, unzip the file, and run the sqldeveloper.exe file. No separate installation is needed—just ensure Java is installed on your system.

