 User-Guide · Jul 5th 2024 · 7 Min read
How to Install RDS on Windows 2019 and Activate RDS License Server
Installing Remote Desktop Services (RDS) on Windows Server 2019 is essential for enabling remote access to your server. RDS allows users to connect to the server from different locations, enhancing productivity and flexibility. To install RDS, you need to add related roles on the Server Manager. We provide easy steps to install and activate RDS on Windows Server 2019 in a straightforward and easy-to-understand manner.
Install RDS by Installing Related Roles on Server Manager
To install RDS on Windows 2019, you must install related roles on the server manager.
Follow the steps given below to install Related roles on Server Manager:
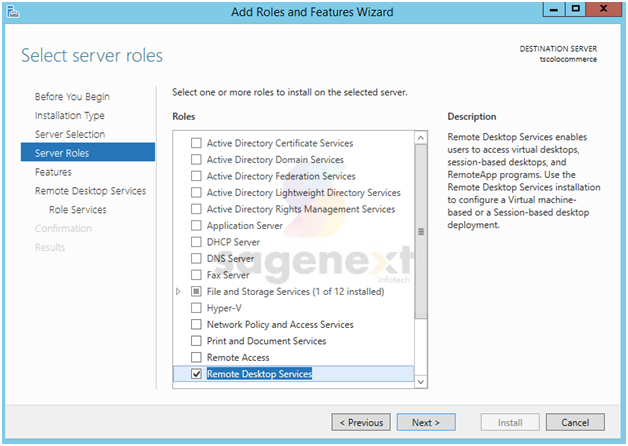
Step 1: First, you need to navigate to the Windows server. From therein, go to “Server Manager” and click on the “Add roles and features” option.
Step 2: On the “Server Roles” box, select “Remote Desktop Services” and “Remote Desktop Licensing Diagnoser”. Lastly, choose the “Next” option.
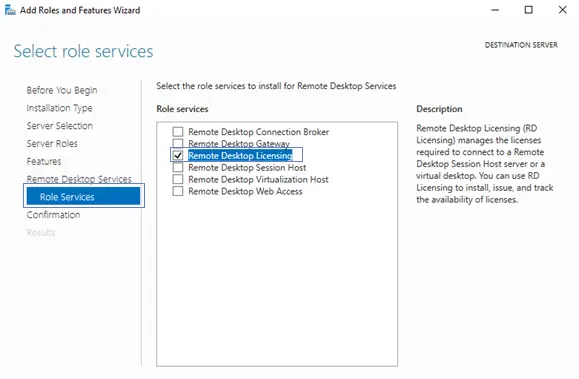
Step 3: Select the “Role Services” in the Add Roles and Features Wizard.
Step 4: Now, click on the “Add Feature” on the pop-up message.
Step 5: Select the “Remote Desktop Licensing” and “Remote Desktop Session Host” checkboxes among the options available in the Role services.
Step 6: At last, users must choose the “Yes” option on the warning message.
Once you select the Yes option, wait for the installation process to finish, and you have successfully installed RDS.
Activation of RDS License Server (RDS Server Installation)
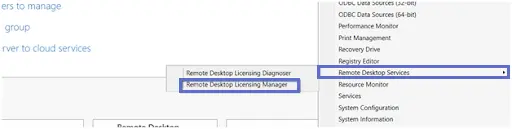
Step 1. Access the “Remote Desktop Licensing Manager”. Click the server name and then choose the option to “Activate Server”.
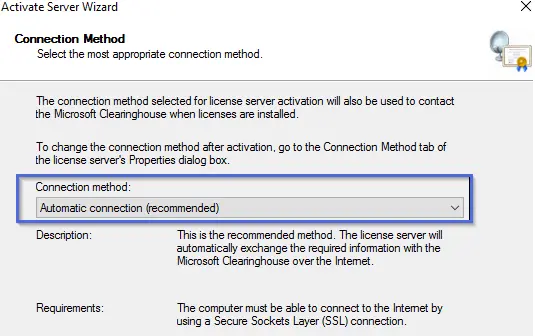
Step 2. Activate the Licenses on the “Remote Desktop License Server” tab.
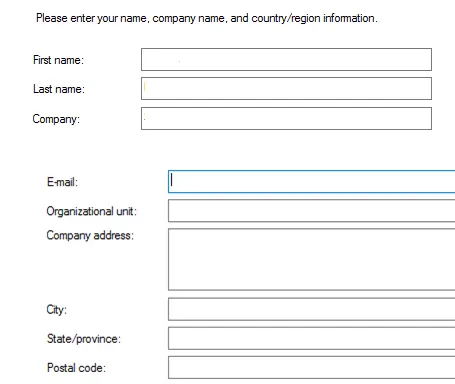
Step 3. On the “Company Information window,” fill in the prompt required fields and click “Next” to activate your License Server.
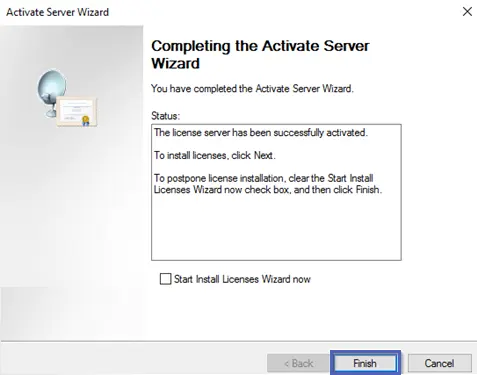
Step 4. Once activation is complete, select the “Start Install Licenses Wizard“ checkbox and click “Finish”.
Installation of Licenses on the Remote Desktop License Server
Step 1. When the “Welcome to the install licenses wizard,” prompt comes up, click on Next.
Step 2. Select the program from where you obtained your RDS CALs (Client Access Licenses), and then click Next on the License Program page. The Service Provider License Agreement is the one to go with if you give services to others.
Step 3. As per the Windows RDS Licensing Program, you choose on the previous page, type either the license code or the agreement number you got when you bought your RDS CALs, and then click Next.
Step 4. Choose the Windows Service edition on the “Product Version and License Type page”, and then choose “RDS Per User CAL for the license type”. Proceed by selecting the “Next” icon.
Step 5. When the RDS CALs are installed on the server, click “Finish” and check the result.
Conclusion
Installing and activating Remote Desktop Services (RDS) on Windows Server 2019 involves adding specific roles and features through the Server Manager. By following the outlined steps, you can ensure that RDS is correctly installed and licensed, allowing users to remotely connect to your server. Proper installation and activation of RDS not only enhance the server’s functionality but also improve remote work capabilities, providing a seamless experience for all users.

