 ProSeries · Jun 24th 2024 · 7 Min read
How to Download and Install Intui ProSeries Tax Software?
Intuit ProSeries tax software offers a virtual office for tax preparation, filing returns, calculating e-file, and tracking discrepancies. The software is designed for accountants. However, Intuit provides video tutorials, webinars, and live training that makes it easy for you to navigate the dashboard and serve your clients better. Here we are explaining Intuit Proseries tax software download and install.
System Requirements
- Operating System: Windows 10, Windows 8.1, or Windows 7 (SP1)
- Processor: Minimum Intel Core i3 or equivalent AMD processor
- RAM: Minimum 4 GB RAM (8 GB recommended for optimal performance)
- Hard Disk Space: Minimum 2.5 GB available disk space
- Internet Connection: Required for product activation, updates, and e-filing
- Adobe Reader (free download)
Steps to Intuit Proseries Tax Software Download
To Intuit Proseries tax software download follow the steps given below:
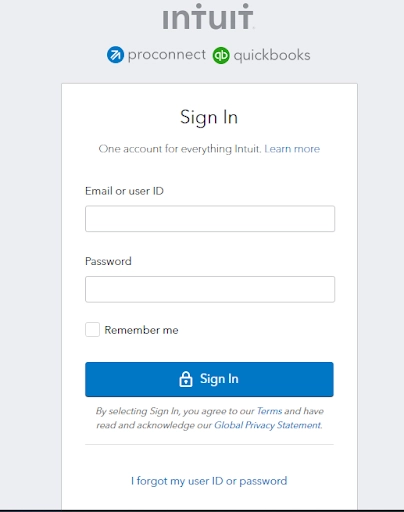
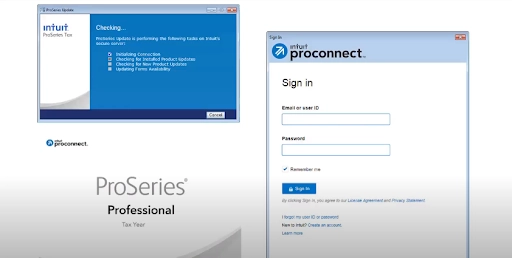
Step 1. Create an Intuit account or sign in to My Account if you already have one.
Step 2. Enter your username or Email
Step 3. Enter your password
Step 4. Click on “Sign In”
Step 5. Once you’ve logged in, a dashboard will display. Then, select the download button for ProSeries.

Step 6. If you want to download prior versions of the software, select “Previous Years” just below the download button.

Step 7. Depending on your web browser, you may be notified to “Run,” “Save,” or “Open” the download file before the installation begins.
Steps to Install Intuit ProSeries Tax Software
Step 1. The initial welcome page will appear on your screen. Select “Next” to begin the installation process.

Step 2. Review the license agreement, then select the “I accept terms of the agreement” radio button. Select “Next”
Step 3. The Installation screen will prompt you to select either a Stand Alone or a Network installation.

Step 4. For “Network,” ensure the computer you’re using is the one you’re giving the administrative rights to. Select “Network”, then click “Next.”
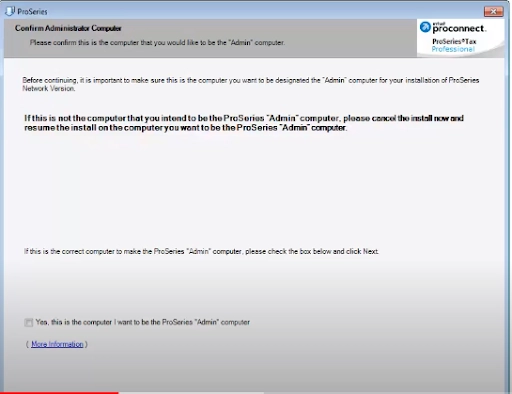
Step 5. The confirm administrator window will be displayed. Click the box that reads, “Yes, this is the computer I want to be the ProSeries admin computer.” Select “Next” to continue.
Step 6. The workstation name screen will display the name of the computer you’re using for the installation. You can change the default name. Click “Next” to continue.

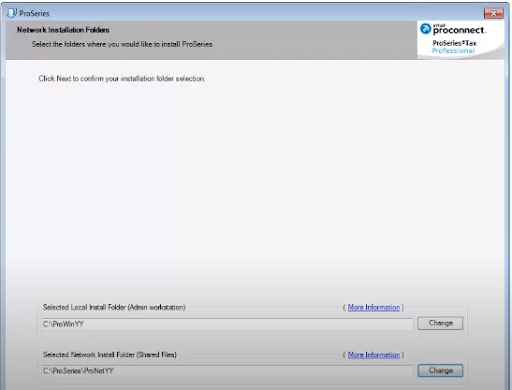
Step 7. On the network installation folder screen, the local install folder and network install folder fields will display a default location on the hard drive of your computer.
Step 8. Change the path for the network install folder to that of your server if you’re using a client-server environment. If you’re using a P2P environment, leave the default pathway. Click “Next.”
Step 9: Select the Federal products and the State you will work with on the products screen. Remember, only choose the items you need. Selecting everything will install unnecessary software and lengthen the installation process.

Step 10. Select “Next”. Then, the selected products will begin to download.
Step 11. The application settings screen will appear and automatically install key components for the program. In the meantime, you can review the settings or simply wait for the installation to complete.

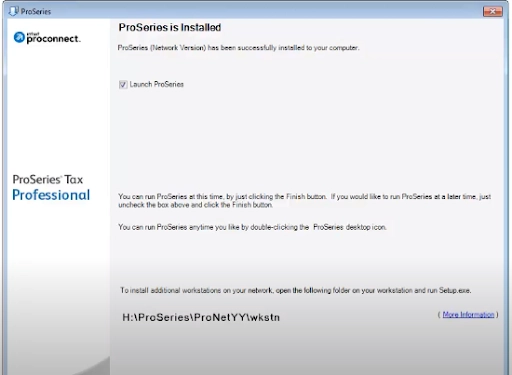
Step 12. Continuing with the installation process, once the program has been installed, the “Launch ProSeries” checkbox will be selected. Click “Finish” to launch the program.
Step 13. When the program launches for the first time, you will need a license. Next, click “Next” to continue with the licensing wizard.
Step 14. Enter your customer number and “SOLD TO” zip code, then click “Next”.

Step 15. The wizard will connect to the Intuit server to confirm your provided information. Once the confirmation process is complete, click “Next” to proceed.
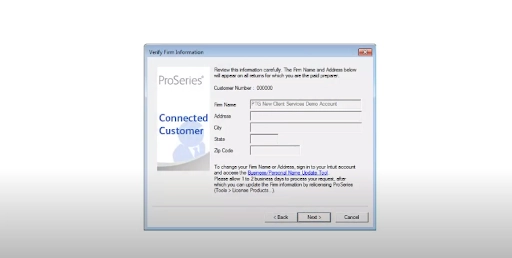
Step 16. The verify firm information screen will display your company’s information as it will appear in your tax returns. Verify the data, then click “Next.” If the information is incorrect, click on the “Business/Personal Name Update Tool” link to make the necessary corrections.
Step 17. The product licenses screen will display the products that your company is licensed to use. Thereafter, click the “Continue” button.
Step 18. The ProSeries program will launch, and then you can sign in to start using the software. The program will also check for updates running in the background while setting up the software.
Step 19. After logging in, follow the prompts to set up the software and save the updates.
Conclusion
Filing accurate tax returns is a tiresome and time-consuming task, therefore, it is often left to professionals. Consequently, to make the job easier and faster for tax preparers, tax preparation software can be a valuable tool.
Good tax software should be easy to use, affordable, offer technical support, and calculate returns without errors. And, if the software offers a cloud-hosted version, that’s a major advantage. These features can make the tax filing process significantly smoother and less stressful.
Intuit’s ProSeries tax software increases the effectiveness of tax preparers by offering better ways to manage data and quick processing of tax returns. Consequently, accountants can process returns for more clients within a tax year. This translates to more time for in-depth consultations with each client. With the help of ProSeries tax advisors, accountants can then recommend ways their clients can reduce tax liabilities and maximize their tax returns.

