 QuickBooks · Sep 8th 2026 · 7 Min read
Step-by-Step Guide: How to Create a QuickBooks Online Account in 2026
Your client calls on a Monday morning — they need you in their books by end of day. They’re on QuickBooks Online and you don’t have access yet. Getting a new QBO account or adding yourself as an accountant user takes under ten minutes if you know the exact steps. Here’s exactly what to do.
What You Need Before You Start
Before you hit the Intuit signup page, have these ready:
- A business email address you control (not a shared inbox)
- A strong password you’ll actually remember — QBO enforces complexity rules
- Your phone number for multi-factor authentication
- Payment details if you’re buying a plan outright, or skip that entirely if you start on a free trial
- Basic business setup information: bank and credit card login access, any open invoices or bills, and payroll details if you run payroll
Having these on hand before you start means you finish the signup without stopping mid-flow.
Step 1: Choose Your Country and Plan
Intuit’s signup flow begins on a country-selection page. Choose United States, then select the QuickBooks Online version that fits your situation — Simple Start, Essentials, Plus, or Advanced. If you’re evaluating for a client or just getting started, Intuit lets you choose either Buy Now or a Free Trial at this point. For most practitioners testing QBO for a new client engagement, the free trial is the right call — no payment details required upfront.
Not sure which plan to recommend? Simple Start covers one user and basic income/expense tracking. Essentials adds bill management and up to three users. Plus handles inventory and project tracking. Advanced is built for larger teams with more reporting needs.
Step 2: Create Your Intuit Account
Once you’ve chosen your plan, Intuit routes you to the Create an Intuit account or Sign up page. Here you enter:
- Email address — this becomes your Intuit ID across all Intuit products
- Password and Confirm Password
- Phone number — used for account recovery and MFA verification
Click Create account. Intuit then sends a verification link to your email. Open that email, click the link, and your account is confirmed. If the email doesn’t arrive within two minutes, check your spam folder before requesting a resend.
Step 3: Complete Business Setup
After email verification, QBO walks you through an onboarding sequence. This is where most new users skip steps they’ll regret later. Don’t rush it.
Intuit may ask for business setup information including:
- Bank and credit card logins — to connect accounts for automatic transaction import
- Open invoices or bills — so your starting balances are accurate
- Payroll information — if you’re running payroll through QBO Payroll
You can skip sections and return later via Settings > Account and settings, but connecting your bank accounts at setup saves significant reconciliation time later.
Step 4: Add Company Information
Once inside the dashboard, go to Settings (the gear icon, top-right) and select Account and settings. Work through the Company, Billing, and Advanced tabs to:
- Add your legal business name, address, and EIN
- Set your fiscal year start month
- Choose your accounting method (cash vs. accrual — this matters for tax reporting)
- Turn on features you’ll actually use: classes, locations, or multicurrency if relevant
For accounting firms setting this up for a client, the Advanced tab is where you lock in the accounting method. Cash-basis clients on accrual settings create a mess at tax time — set it correctly now.
Step 5: Configure Your Chart of Accounts
QBO generates a default chart of accounts based on your business type. Review it before you start entering transactions. To add a new account, go to All apps > Accounting > Chart of accounts > New account.
For each new account you must enter:
- Account name — be specific; “Bank — Chase Checking” beats “Bank”
- Account type — Asset, Liability, Equity, Income, or Expense
- Detail type — the subcategory Intuit uses for reporting
For balance-sheet accounts, you’ll also need an Opening Balance and an As of date. Get these figures from the prior period’s balance sheet or your client’s records. Entering an incorrect opening balance is one of the most common setup errors — it causes reconciliation failures every month thereafter.
Step 6: Log Into QuickBooks Online Going Forward
Once your account exists, logging back in is straightforward:
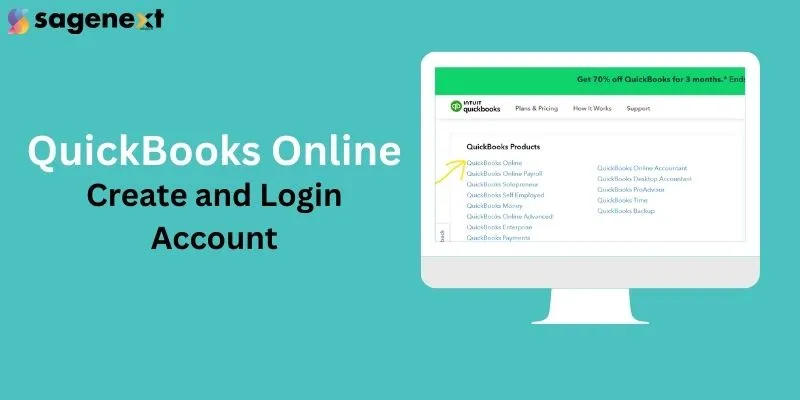
- Go to the Intuit login page and select QuickBooks Online from the product list Intuit
- Enter your email address and password
- Complete the MFA step if prompted (a code sent to your registered phone)
- You can also sign in using your registered phone number instead of email
Bookmark the direct QBO login page rather than navigating through Intuit’s main site — it saves a click every time.
How Sagenext Helps
QuickBooks Online is browser-based and works fine for a single user on a reliable connection. The friction shows up when your firm has multiple staff accessing client data simultaneously, or when you need QuickBooks Desktop alongside QBO for clients who haven’t migrated.
Sagenext hosts QuickBooks Desktop, Enterprise, and other accounting software — Drake, Lacerte, ProSeries, UltraTax — on fully managed cloud servers. That means your team connects via remote desktop from any device, backups run automatically, and software updates don’t fall on your IT to-do list. For a firm juggling ten or twenty client files across different software versions, that separation of concerns matters.
If you’re evaluating whether hosted Desktop or QBO Online is the right fit for a specific client, Sagenext offers a free trial with no credit card required.
For a deeper look at how QBO compares to hosted Desktop for CPA firms, see our breakdown of QuickBooks hosting options. Remote Hosting QuickBooks Desktop
Key Takeaways
- Start signup on Intuit’s country-selection page, pick your QBO plan, and choose a free trial if you’re evaluating — no payment needed upfront.
- Have your email, phone number, business bank logins, and any open invoices ready before you start; stopping mid-flow to gather these wastes time.
- Set your accounting method (cash vs. accrual) in Settings > Account and settings > Advanced before entering a single transaction.
- When adding chart-of-accounts entries, always enter an accurate opening balance and as-of date for balance-sheet accounts — errors here compound every reconciliation.
- Enable multi-factor authentication immediately; it’s the single most effective step to protect a client’s financial data.
- For firms running QuickBooks Desktop alongside QBO, managed cloud hosting removes the IT overhead and supports multi-user access without a local server.
Frequently Asked Questions
Can I create a QuickBooks Online account without a credit card?
Yes. When Intuit presents the option to Buy Now or start a Free Trial, choose the free trial. Intuit does not require payment details to begin the trial. You’ll only need to enter billing information when you decide to continue with a paid subscription after the trial period ends.
What information does QuickBooks Online ask for during setup?
The signup page asks for your email address, password, and phone number. After account creation, QBO’s onboarding sequence asks for business details including bank and credit card login access, open invoices or bills, and payroll information if you run payroll. You can skip sections during setup and return to complete them later.
How do I add my business details after creating the account?
Inside QBO, click the gear icon (Settings) in the top-right corner and select Account and settings. Work through the Company, Billing, and Advanced tabs to add your legal name, EIN, fiscal year, and accounting method. You can also turn on additional features like classes and locations from this screen.
How do I add accounts to the chart of accounts in QuickBooks Online?
Go to All apps > Accounting > Chart of accounts, then click New account. You must enter an account name, account type, and detail type. For balance-sheet accounts — assets, liabilities, equity — you also need to supply an opening balance and the as-of date that balance applies to.
Can multiple team members log into the same QuickBooks Online company file?
Yes, but the number of simultaneous users depends on your plan. Essentials supports up to three users, Plus up to five, and Advanced supports more. To add a team member or accountant, go to Settings > Manage users and send an invitation. The invited user needs their own Intuit ID to accept access.