 QuickBooks · Feb 5th 2025 · 7 Min read
How To Use Exporter Transaction Pro?
In the realm of accounting and bookkeeping, efficiency and accuracy are paramount. It is a robust tool designed to streamline the process of exporting data from QuickBooks, allowing you to manage your financial information with ease. Whether you’re looking to generate reports, analyze transaction histories, or move data for backup purposes, mastering Exporter Transaction Pro can save you significant time and effort. This blog provides easy steps to help you utilize this powerful tool effectively, ensuring a smooth and seamless data export experience. Let’s get started on simplifying your data management with Exporter Transaction Pro!
Steps to Use Exporter Transaction Pro
Step 1: Get Started
When you have added the application to your account, log in and open QuickBooks, then log into your company file.
Step 2: Launch Exporter Transaction Pro
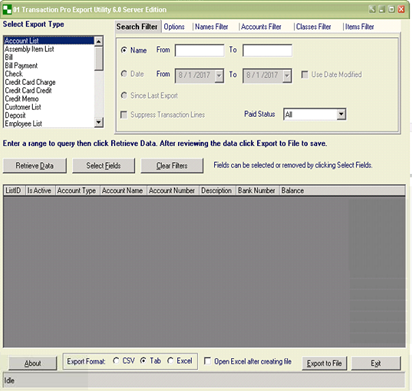
You will see the home screen when you open the app. You can select the type of data you want to export as well as a specified date range from here.
Step 3: Data Selection
You can see this with selected data.

Step 4: Open Excel Directly
You have set up your data for export, you may choose which format you want to export to. You can also select to open Excel right after exporting if you want to.
![]()
Step 5: Save the File
When you are done, click Export to File, choose where you want to save the file (usually on your Sagenext Z: drive) as well as a name for it.
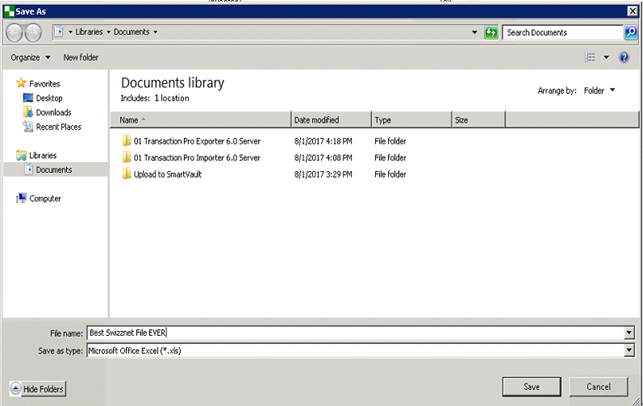
And that’s it! Your export is complete!
Exporting with Transaction Pro: Exporter is easy!
If you do not already have access to it, you can always set up access via the Marketplace or by contacting sales@thesagenext.com.
Also Read: How to Create and Login Intuit QuickBooks Online Account in 2024

